Infrared fourth steps

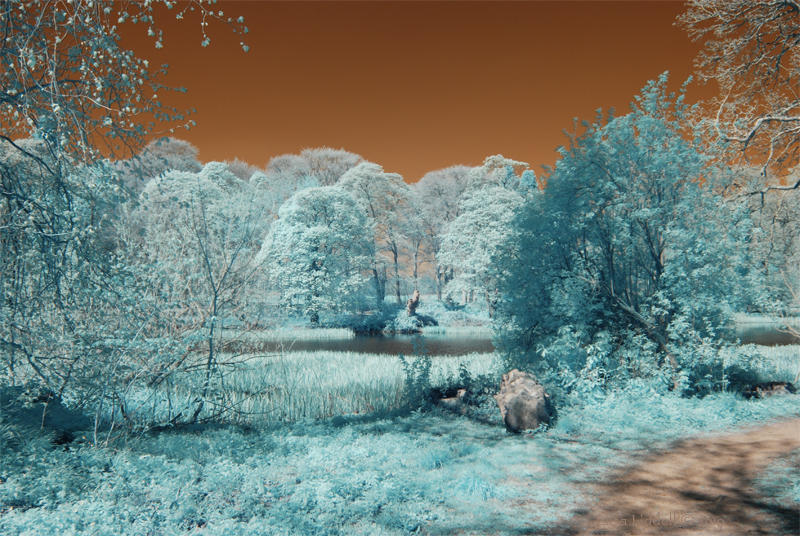
Walking beside the loch at Fyvie Castle
Walking beside the loch at Fyvie Castle, shot with the Super Goldie filter

Adventures in the IR Wonderland 4 – Enter the Goldie!

My adventures in the photographic and visual ‘Wonderland’ that is Infrared (IR) had begun. As I have described in the previous articles, the very first converted camera I found on eBay was an old Nikon D90 and the IR filter was the gentle 720nm. I had jumped in without knowing much about the range of filters that are available, and how wide the spectrum of infrared light is. It didn’t stop me taking some lovely shots, and thoroughly enjoying the results. So don’t be dismayed, you don’t need to study a whole lot to have immense fun with IR; and like me, you can pick up what you need to know as you go along!

I discovered with the 720nm filter that some slight colour did appear in the photos I took, and I learned how to use Photoshop to manipulate the colour casts to produce images that I really enjoyed. But my adventures were only just beginning! As I posted shots to IR Flickr groups, and looked at images online I saw that there was a whole range of colours represented. They were definitely shot in the infrared spectrum, but how did the photographers achieve such dazzling results? I saw red trees, blue trees, orange skies – I wanted to discover how to get such wonderful colour combinations! Folks on Flickr are often very kind and will post the EXIF details of the shots they take and add in text or tags what filters and settings they use. It is a wonderful resource!

I began to collect the knowledge I needed to take the next step. I decided that the filter I wanted next was the 590nm IR Filter (Super Colour or Goldie). I call it my Goldie for short! The lower the nm number, the more colour is let in to the camera sensor. 590 is very low so there’s plenty of colour coming in. Once again I decided to go with a dedicated camera that had been converted to only shoot in the IR range – this time I was after the 590nm part of the IR spectrum. The Nikon I found was even older – a D80. But this time I had some experience with the converted D90, so I was reasonably confident that I was on the right track to find that elusive and magical shot that would take my breath away ;o)

I guess that the Goldie filter is named after the way it renders the sky – which is a deep golden colour. The trees, instead of being white (like the 720nm filter) are blue – reminiscent of the blue-rinse hair colour that used to be so popular with older women!
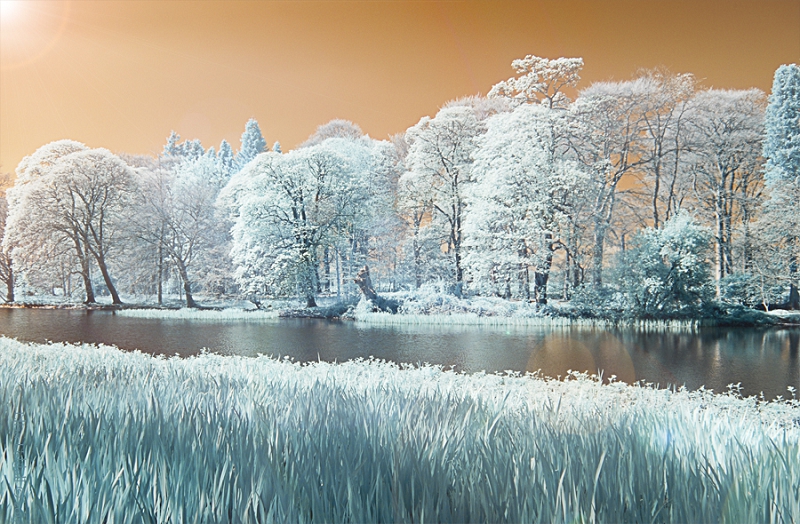
The loch-side at Fyvie Castle
The loch-side at Fyvie Castle, with the water iris beds in the foreground and the trees across the loch

I was not disappointed. The shimmering golden sky and blue trees were so beautiful! And the blues were nicely graded in tone. I had added another complete ‘world’ to my Adventures in Wonderland!
As with the 720nm I found that there was a way to compose the shots that helped a whole lot.
Include something that is going to show up as dark – natural stone, tree trunks, and water can do the job perfectly. In this shot the tree trunks and the water of the loch help to define and frame the pale blues that edge into white. Shadows can do the same job, just as they did with the 720nm.
Shooting from shade into light can be very helpful. Here the shadows in the foreground come from the water irises and their leaves. And there’s a nice dark shadowy patch on the right side across the water, caused by the strong sunshine coming in from top left. The golden sky also deepens towards the top of the frame.
So I started taking my new Goldie out and about and shooting more of the familiar local places that I visit regularly. I found it helped to know the locations, as there was plenty to learn about the camera and how the filter responded to the light etc.
Here is the medieval kirkyard at Banff Aberdeenshire.
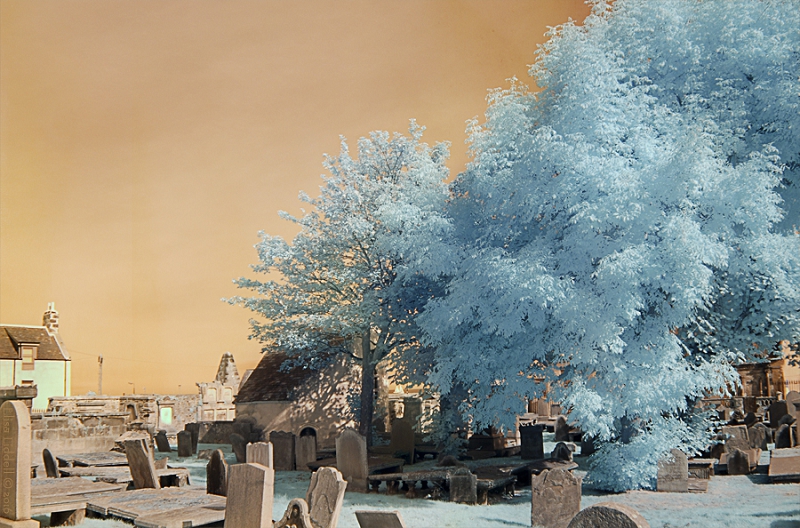
The medieval kirkyard at Banff Aberdeenshire
The medieval kirkyard at Banff Aberdeenshire – Super Goldie filter

Here the light has caught the towering mass of trees well, showing many tints and tones, shadows and detail. Again the golden sky (not so bright as the sun was not so strong) and the more ‘natural’ colours of the gravestones and buildings.
Next is the bridge between Banff and Macduff, Aberdeenshire, Scotland.

Deveron estuary - the bridge
The bridge across the Deveron estuary at Banff, Aberdeenshire, Scotland.

The bridge across the river Deveron estuary at Banff, Aberdeenshire, Scotland. Shooting here I tried to use the stonework of the bridge to frame the image. The sun was high and bright, and the lens caught a sun flare. I hoped that the stone of the bridge together with the shadows it cast would balance the bright background, that otherwise could be bleached out!
See a larger-pixel version here on Flickr, where you can look much closer: Deveron Bridge
Now back to Fyvie loch – this time showing more of the water.
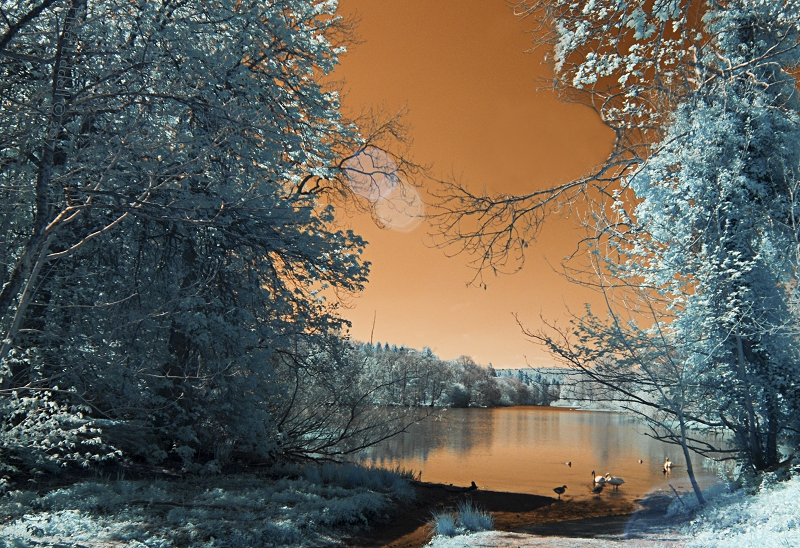
Super Goldie of Fyvie loch
Fyvie loch where a small burn feeds into the loch

Here I have a clearer view of the water, and the reflections of the sky and the trees are lovely and clear. A golden sky, and ‘on golden pond’ too, with gold water! The foreground offered some good tree shade to frame the scene, which is almost completely surrounded by the light blue of the grass and foliage. And again there is a light flare, pale blue, coming in almost like a double moon in the sky! And finally the ducks, geese and swans that congregate where the burn opens into the loch add a sense of scale.
Again, you can see a larger-pixel version here on Flickr: Golden Pond

It soon became a firm favourite and I took it everywhere!
If I could only have one IR camera (and I now have 5!) it would be this old Nikon with its Super Goldie 590nm filter. It is so versatile.
As I’m about to show, with a computer you can manipulate the shots you take to produce a whole range from B+W infrared through a range of colour effects. There’s more scope for experimenting and refining stunning images using this Goldie filter than the other filters I have.

So, on the next page I’ll explore just what you can do with Photoshop and a brilliant FAUX free action.
On to the FAUX adventure
Some more information on the the Goldie:
“”The Super Color IR filter is our most colorful filter, its 50% pass frequency is 590nm and its closest equivalent would be the Wratten 29 filter. This filter passes the most visible red light along with IR and therefore the resulting images have the most saturated colors. Which can further be manipulated in Photoshop to produce a dizzying array of effects.” [thanks: https://www.lifepixel.com]

Back to the start of the IR section
My photography articles Talking Digital Photography
Flickr holds Elisa’s online Photo Gallery
© 2019 Elisa Liddell

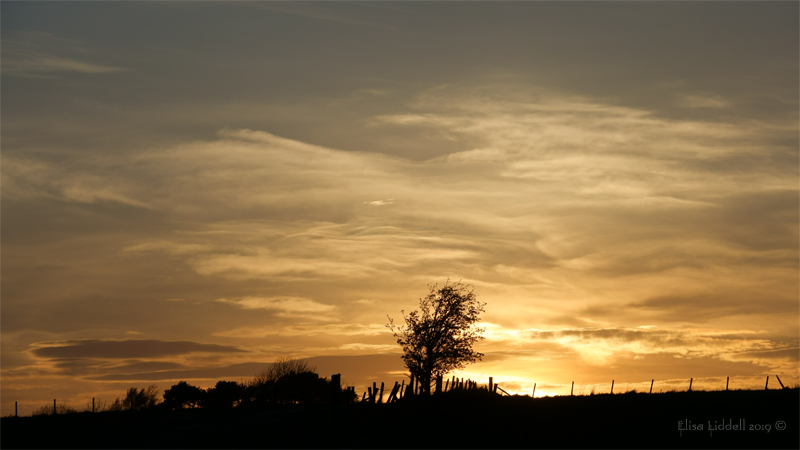
Sunset Easter 2019

Sunset closes Easter day 2019.
Sunset closes Easter day 2019. Sony RX10m3

Too good to miss the sunset today! The sun sets over the back field behind our house, and sometimes gives us a magnificent light show. The fading light combines with the cloud-scape, and the darkening into silhouette of the trees and the fences. A perfect end to a warm and sunny day.
Flickr holds an album of shots taken of the field behind our house here

Flickr holds Elisa’s online Photo Gallery
© 2019 Elisa Liddell


Infrared is so cool!

Infrared shot of Fyvie loch with bench.
Infrared shot of Fyvie loch with bench. Nikon D90 with 720nm filter

No, it’s not red! And it’s not winter here either! It is summertime at Fyvie loch, and I used a custom converted camera to take this shot.
I’m writing a series of articles about my adventures in the ‘Wonderland’ of Infrared (IR) photography – quite as exciting a world as Alice found through the looking-glass!
It starts here, and covers the three infrared filters that I have; the 720nm the 850nm and the 590nm (Super-Goldie) I’ve not finished it all yet, but the gentle 720nm was my very first infrared filter, and my way into the whole IR world. So I wrote about it first. It taught me about how the colours can be completely different and quite unexpected too. I looked at using it shooting still-life compositions, as well as the more familiar landscape shots. This is the section I have already completed. My first ever landscape shoot is followed back into the ‘studio’, with the post-processing here.
I have a gallery of all the infrared photographs I’ve posted online on Flickr

Flickr holds Elisa’s online Photo Gallery
© 2019 Elisa Liddell


Help the camera?

…. or “When the camera can’t quite cope!”

The camera can do a wonderful job, but sometimes it needs a little help to capture what your eye and brain together can see. One of those conditions is when there are extremes of light and dark in the same shot.
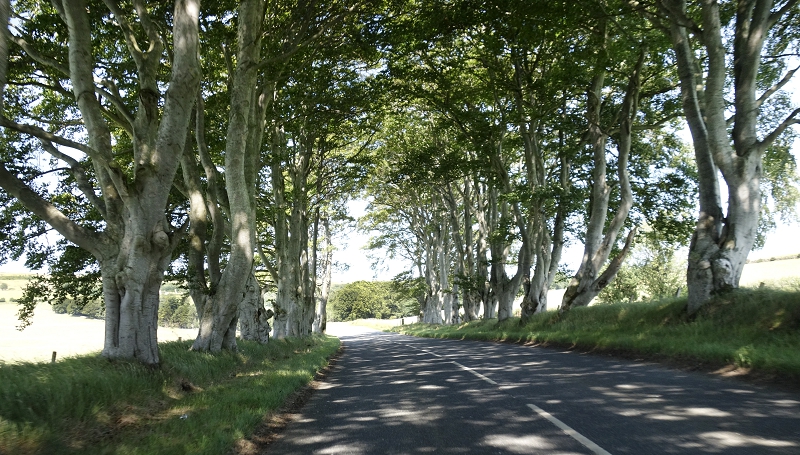
I use the amazing Sony RX100 to shoot when we are driving along (maybe at 50 mph) to capture the journey. We’ve a lot of beautiful countryside locally, but with no places to stop and carefully frame shots! In this frame you can see the bonnet of the car in the bottom right corner. Shooting at speed in ever changing conditions I just have to point and click – and set the camera to Auto, and let it make the second-by-second decisions. In this shot the camera has evaluated the extremes of light and shadow, and chosen a middle point as the best compromise.

The original shot captured through the windscreen
The original shot captured through the windscreen at 50 mph

What I wanted to capture was the amazing, bright sunshine shining through the canopy of the trees, and dappling the road. The camera has made a good starting point. I’ve got the essence, and the bones of the image I saw and wanted – but the camera can’t adjust to the brightness of the landscape beyond the avenue of trees and to the shadows under the tree canopy – not at the same time. BUT the information is all in there – it just needs a little help to bring it all together
So I started work on the original image. I don’t crop or straighten at all at this point, as I want to take several versions of the shot and overlay them exactly … The technique I use is one that doesn’t damage the actual image, but places Layer Masks over the image. You can then adjust or delete the mask, and start again with the underlying image intact.

In Photoshop I opened up the image and called it Layer 1 – the original ‘middle value’ shot which will be the base layer.
Next I wanted to add a layer with the exposure lowered, in order to see what has been bleached out in the land beyond the avenue of trees. So I loaded a second version of the original image into Camera Raw, and lowered the exposure and/or brightness levels until I could see the detail in the landscape beyond the avenue. Then I took this 2nd version into Photoshop – where I can then drag the darker version and place it exactly over the original (hold the shift key while dragging).
This layer I called Layer Dark. It sits on top of Layer 1 and completely obscures it.
So then you need to choose from the top menu in Photoshop
Layer -> Layer Mask -> Hide All .
The layer disappears from view. But you can then gently paint in the darker values of the far bushes and trees

Areas that need darkening

These are the areas in the distance that have been bleached out in the shot. The information is there in the shot the camera took, but it needs a lower exposure level to bring it out! You can adjust how dark you want them to be, so that they seem natural, as what the eye might see.

Then I usually save the PSD file; so my next step was to name and save the PSD file. This means I can return and adjust this first step at any time. The alternative would be to flatten the image and continue. I prefer to save the changes as a new Jpeg or Tiff and use it as the new base layer in another PSD file.
So in my new PSD file the next step was to deal with the dark area of the image. So I took a second version of image-2 into Camera Raw. This time I over-exposed the image in Camera Raw, looking for the lighter tones and shades that I wanted to use to highlight the luminosity that there was under the canopy. Again I imported this lightened image, and placed it exactly over the image-2 base layer. Again I chose a Hide All layer mask. and again painted in the areas that I wanted to lighten

Areas that need a lighter tone

I used this stage to brighten and lighten the tree trunks and some of the leaves
Now I had the adjusted version, with both darks and lights added to the original ‘compromise image’. This image was much closer to what I saw as we drove along.
Again, I saved the PSD file and then saved the complete, edited image.

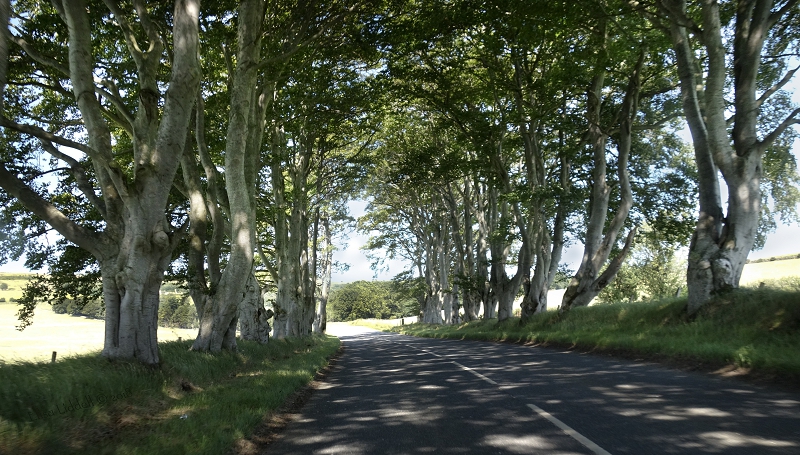
After both light and dark adjustments
After both light and dark adjustments have been made

Then all that remained was to do some cropping, and straightening to give the composition I wanted.
I wanted to remove the large tree-trunk at the extreme left of the shot – it unbalances the picture. And of course I wanted to remove the car bonnet too. I could just clone stamp it out, but I preferred to crop it out, as that crop brought the avenue closer. And finally there was a small strip down the right side that was bleached out and empty, so a small slice was cut down that side too.

Trimming the shot
Trimming the shot to improve the composition

Now we have the final image. Or is it?
Now I could see the composition and the balance of elements. Yes – that’s what I wanted. But there was something still niggling at me, and it had become clearer now.
There were areas around some of the tree canopy where the camera has been able to capture the blue of the sky – and the areas away from the leaves were still pretty bleached out. Could I somehow paint in a blue tint to soften the sky a bit?
This was a bit of an experiment – but I created a new layer and made a diagonal gradient fill based on the blue tints in the photograph. I placed the layer above the image, chose a Hide All layer mask and gently tried to paint in some blue…. just to hint to the eye that the sky WAS blue! Looked at now, the blue halo effect that the camera had created was not so noticeable. But somehow the tree trunks seemed a bit too bright … so as a final touch I darkened a few of the tree trunks.
It was a minor after-thought, and I often make two or more slight variations on the final image, so I can set them aside and come back to them before making a final selection.

The final image
The final image, ready to upload

Note: I always struggle, and try to view the ‘finished’ image through several monitors and screens (iPad, laptop, desktop). It’s an area where painting is much simpler, as colour values shift from monitor to monitor.
Hopefully the end result will be ‘true to life’ and closer to what the eye actually saw in that fleeting moment – but there has been extensive post-production to create the nuances, details, shades and tones that the human eye can see, and the camera cannot duplicate (yet!)
I posted the original image on Flickr with a little more about taking the shot here

Flickr holds Elisa’s online Photo Gallery
© 2019 Elisa Liddell

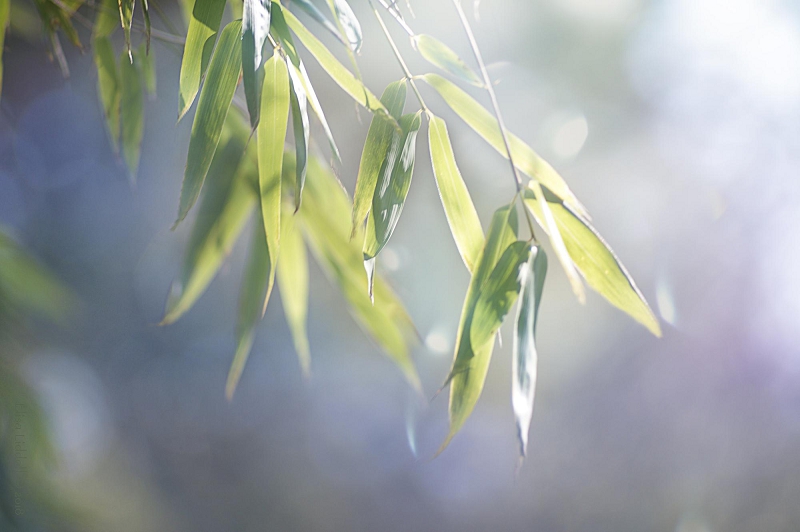
Leaves in sunlight

The final image of Leaves in the sunshine

Early in 2018 we were just emerging from from a long and extremely harsh winter when I made my first visit of the the year to Fyvie Castle and loch. It’s my favourite local haunt, for walking, sitting and relaxing, and of course photography. So I took a camera or two, just to familiarise myself with the ‘outdoor’ lenses. Most of the winter I shoot indoors, which means macro, close-up or medium lens still-life. So I needed to flex the muscles and re-learn or remember the individual personalities of the lenses I use for landscape and outdoor shooting.

My newest outdoor lens is the Meyer-Optik Orestor 135mm f/2.8 (1966) which arrived just before the winter closed in. So I’d not had much chance to get to know the lens and what it can offer. I’ve collected a few ‘vintage’ lenses from Eastern Europe, and been impressed with the quality of shots modern digital cameras can produce using them. The rich and vibrant range of colour values is striking – and this particular lens is nicknamed “the bokeh monster”, which strikes an appreciative chord with me too!
[More about it here, and a further link to the album of shots I’ve taken using it are on my Flickr site.]

So I set out with low expectations, both for the beauty of the location at the end of winter, and for my technical expertise. We had some sunshine, which is so essential, as we strolled along the sunny banks beside the loch. Being a lens from way before the digital age, it needs to be used in full Manual mode, which means setting White Balance, ISO, Shutter speed and Aperture (F stop) on the fly. I want full control over the focus too, as often my interest is not on the closest subject (which is what auto-focus selects). Also there is no IS (image stabilising) so a tripod may come in handy too. I knew from my first experiments last autumn, that F4 or even F2.8 would give me the best bokeh chances. So finding a focal point close by was what I had in mind.

So – on to the actual shot I’m discussing here.
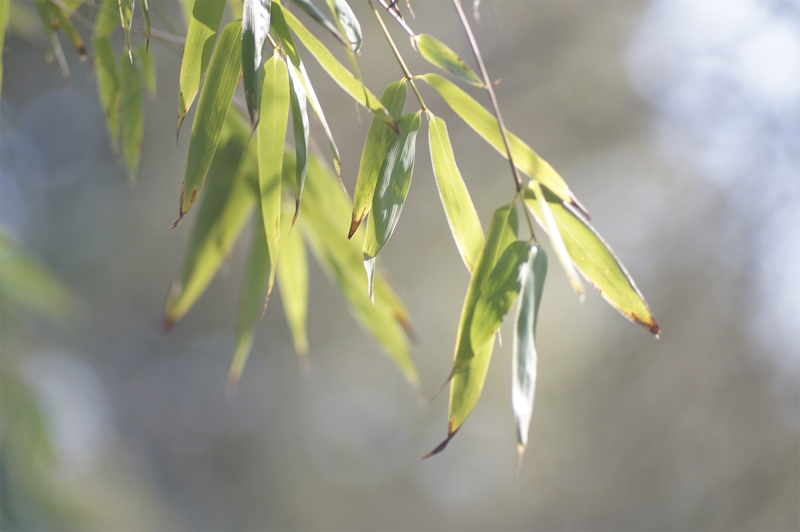
A small frond of leaves lit by the sun caught my eye. Beautiful, simple, and great for a bokeh effect. But closer inspection on the computer screen showed just how much damage the winter freeze had done to the leaves.

Leaves in the sunlight-original
Leaves in the sunlight – the original shot

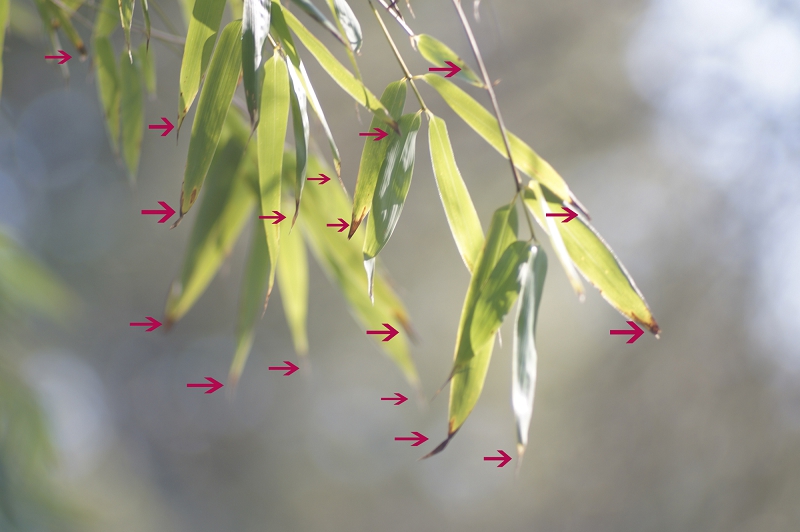
The composition is there, the light streaming in from the top right is lovely, and the bokeh is great – not distracting, but giving a texture to the background. But the damage is so evident – it distracts the viewer! So, if I was to make anything of the photo, I needed a lot of patient work in Photoshop with the Clone Stamp tool. I identified at least 17 places that needed attention.

Leaves places to edit
Leaves, searching out the points to work on

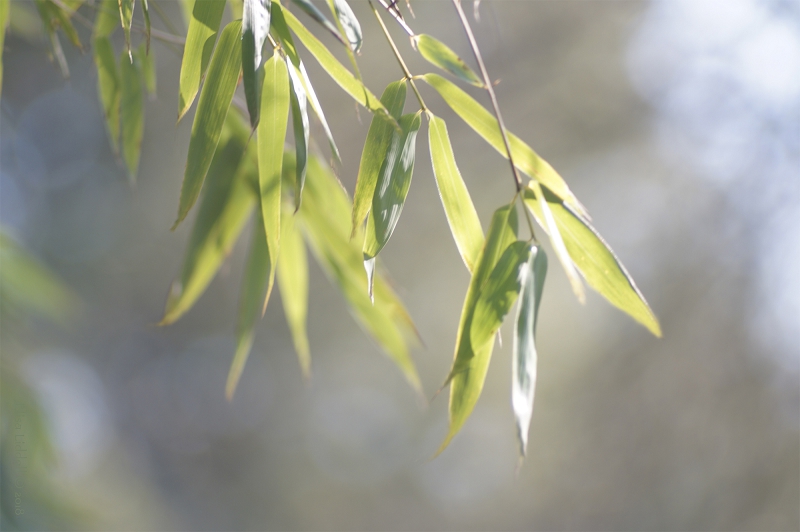
I set to work. The clone stamp tool is a miracle-worker. Used carefully it can transform an image. Here I needed to work with a brush size of between 20-100 pixels. I took the sample from as close to the damaged leaf area as I could, and used a strength of between 40% and 60% most of the time. With a soft brush that leaves little visible trace of the pixel overwriting. I didn’t want to remove all traces of damage, just most of them!

Leaves in sunshine, cleaned
Leaves in the sunshine, cleaned up with Clone Stamp

The image was now usable – and what I wanted to do was to enhance the image without destroying what was already there. I thought I could enhance the bokeh, and add some more colour interest to the background.
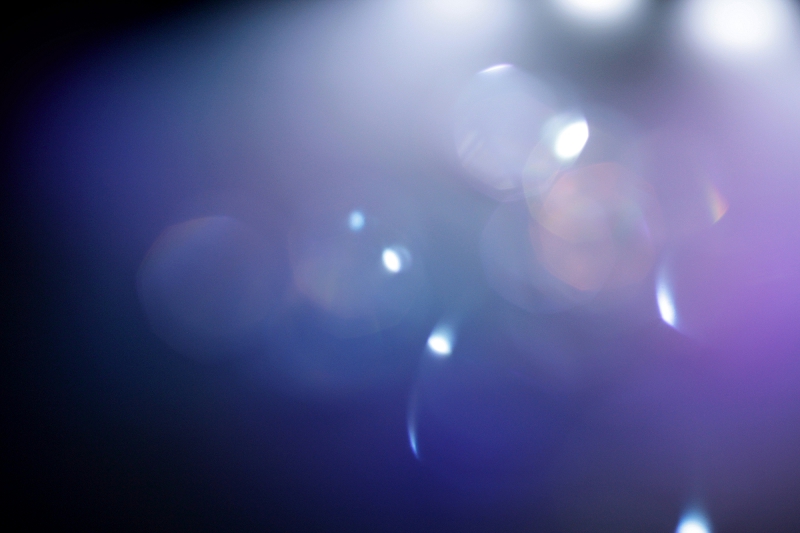
My choice for this was a great favourite of mine – Mix Pix Box – There is a wonderful collection “Light Bokeh Overlays” that would be perfect for the shot.

Light Bokeh from MixPixBox
Light Bokeh overlay from MixPixBox

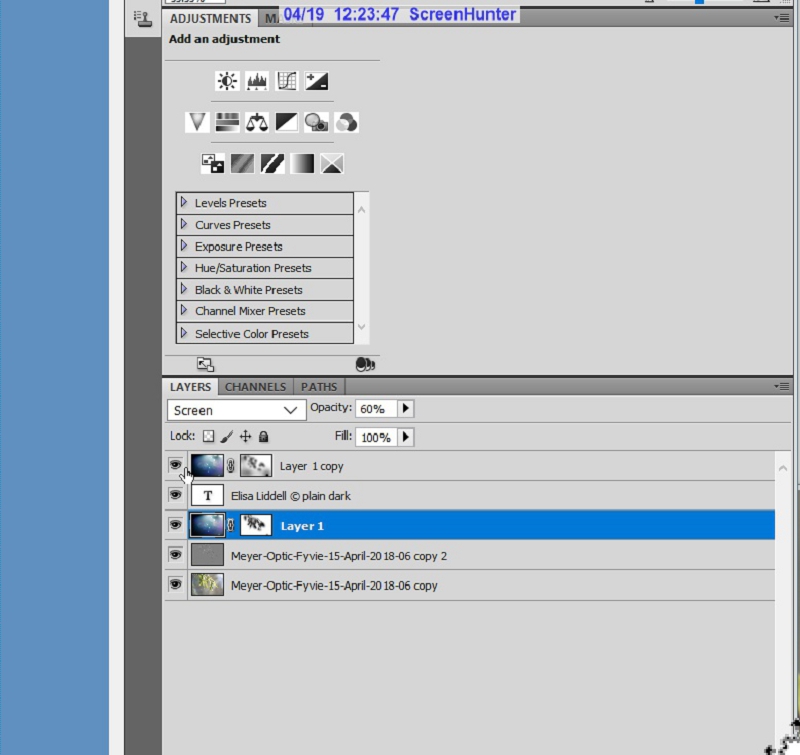
I used this overlay TWICE in different ways. The first layer I applied using the Screen option at 60%. The second time I chose Soft Light setting at 83%. The first offered most light, the second offered most colour. Combined they worked well. I used a Quick Mask on both to bring the leaves forward by gently removing some of the overlay.

Using the MixPixBox overlay
Using the MixPixBox overlay on the cleaned image.

And the final result

The final image of Leaves in the sunshine

The ‘bones’ of a good shot were there in the original. But it took some post processing work to let them shine through!

Flickr holds Elisa’s online Photo Gallery
© 2019 Elisa Liddell


Infrared third steps

Infrared shot of Fyvie loch with bench.
Infrared shot of Fyvie loch with bench. Nikon D90 with 720nm filter

“Adventures in the Infrared wonderland – part 3”

The best way to learn what any camera can do for you is, needless to say, to get out there and start shooting. And thanks to digital cameras that doesn’t have to be an expensive undertaking. Shoot as much as you can, and then ponder the results and see what works and what doesn’t. Then you can start figuring out how and why some things work and others don’t. You may waste a few shooting sessions – but only in discarded shots – they will be invaluable learning experiences!
So here’s a taste of my own first outing. I’d only managed a few shots of the house and garden and the field across the road with my converted Nikon D90 – nothing more daring! So this morning in July 2016 I set off to shoot one of my favourite local haunts – Fyvie Castle and the loch-side walk. Plenty of trees, water and sky – a place I am familiar with. That day I also had my little Sony RX100 in my pocket, taking a few shots of the lush greenery with it as I walked along. So here is the loch-side walk in full colour that July morning in 2016. The sky was bright, but overcast, with little or no blue at all.

Fyvie loch Sony RX100
Fyvie loch shot in full colour with the Sony RX100

And if I was to do a B+W conversion of the same shot, it would look something like this. (processed in Photoshop)

Fyvie loch converted to B+W
Fyvie loch full colour – converted to B+W in Photoshop

I like both versions, they both work for me. Here the lush eye-catching greens have gone, and the shapes of the trees and water irises are clearer. And the green algae floating on the surface is now an elegant white. There’s plenty of ‘punch’ to this B+W version – it is maybe even more dramatic than the colour version.
Now let’s have a look at how Infrared can give us a different view, a different landscape, a different visual world. I happened to take one shot quite close to where I stood when I took the RX100 one I’ve used. It is essentially the same scene but taken from a slightly different point along the walk.

Fyvie loch shot with the Nikon D90 Infrared converted camera.
Fyvie loch shot with the Nikon D90 Infrared converted camera. 720nm

The first impression is of a much softer and gentler image than either the full colour or the B+W version. Different things catch the eye. The trees blend into the overall image, as the tones are close to those of the sky and the water. The tonal progress through the image is simplified, it moves from a dark foreground to a white background sky. Look closer and the subtle gradations of grey begin to emerge. From this position there is more of the loch in the frame, so we can see the way the trees darken as the far point of the water is reached. There’s even a strip of the distant hills many miles beyond – and, look the infrared camera has caught the slight hint of clouds in the sky! In the foreground the reflections are much more prominent, while the left-hand mass of water irises is less distinct.
Now let’s take a step back and look at how this infrared image has reached this final state.

After 3 years I still find that shooting in infrared has the hit-and miss qualities that I found at the start. So let’s take a peek at some of the original infrared shots in their folder. A strange and bewildering mix of effects – some are blue, some have a distinctly yellow, slightly gold cast to the sky, and the final one is recognisably grey.

Photoshop Bridge showing Infrared shots
Photoshop Bridge showing part of the folder of Infrared shots

The very pale blue shots are pretty well blown out, and most probably destined for the bin! The others are all possible, with the slightly yellow sky, and white trees with a tinge of blue. Something I discovered during that first photoshoot is that it helps the composition and the shot a lot if you can:
a) shoot from shade towards light
b) have some darker areas such a stone, tree trunks and pathways in your scene.
These help define the scene, especially when there is a whole lot of green in the landscape you are shooting! As you can see there will be work to do in Photoshop – post-processing is definitely an integral part of the Infrared experience!
Let’s start with the shot I’ve selected in the preview pane. It looks promising. I think it will look good if I used a B+W treatment to remove those tints. So into Camera Raw first.

Infrared shot imported into Camera Raw

Here I can straighten the shot if needed and check the exposure. I can also try out options like de-saturating or converting to B+W. Personally I like to save everything except exposure and straightening until I’m in Photoshop. But if I open the photo into Photoshop as an ‘object’ rather than an ‘image’ it does mean that I can return to Camera Raw and make extra adjustments at any time.
So on to Photoshop ….

Infrared shot imported into Photoshop CS5

And here is where the real magic of post-processing happens. I want the image to be in pure B+W – to give me a range of tones that take me from deep black to almost pure white. The reflections of the trees in the water will be my guide for the blacks, together with the bottom left corner. If I get them correct I should also see more definition in the tree branches top left, and the near tree across the water. I finally choose B+W Neutral Density from the B+W options. The sky and the leaves are not as white as some other options, but there is a lovely range of greys in those branches and foliage.

Fyvie loch shot with the Nikon D90 Infrared converted camera.
Fyvie loch shot with the Nikon D90 Infrared converted camera. 720nm

So that is the final Infrared composition, that you saw alongside the colour and B+W versions. That is quite different to both the full colour shot and the B+W conversion. It and makes for a very different visual and emotional experience. I find that this camera and filter combination can give me the most delicate and ethereal images. And it definitely hooked me that day.

A few general observations before I continue looking into the folder of shots from that first outing. The first thing you realise is that what is green will turn out white with this Nikon + 720nm filter. Add to that anything that is already white and the effect of bright sunshine – and you have a heady mix of light in your shot. The blown-out shots in my folder show this! I had the Nikon set as it came, with Aperture Priority, and the ISO set at 200 and the White Balance pre-set for the filter. I’ve mainly left the settings that way, as they produce some wonderful effects, and I am no expert on how the camera sensors have been altered and adjusted. I admit I haven’t messed with the setting much at all – just to change the ISO a little on really bright days. I know I’ll have some dud shots, especially as the EVF shows me the full colour version as I take the shot. But for every dud I can find a shot that works like magic – so it can balance out.

The old cabin in the woods.
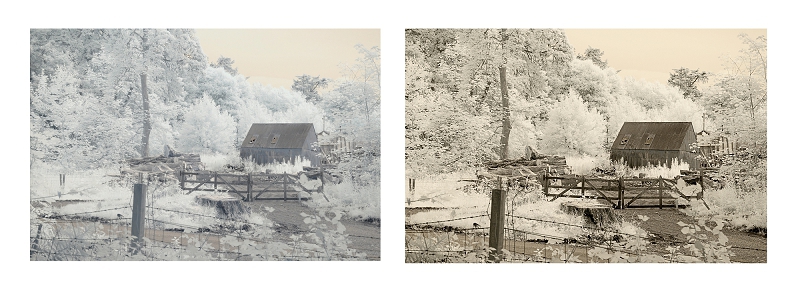
One of the shots showing in the folder is of an old storage shed that looks like it might be used as a wood store. The original shot looked really promising, with plenty of ‘dark’ objects – the path, tree trunks, gate, fence and the shed itself. After I had done the basic conversion to B+W in Photoshop I decided to try out a sepia effect, as it did already look like an old and abandoned shed. I sharpened the contrast, to give me deeper darks, and bring out the lovely definition in the trees,
The full version is on my Flickr site: the log cabin in sepia

Cabin in the woods Infrared and sepia
Fyvie Castle grounds. Cabin in the woods Infrared and added sepia tint

And now one that I have not worked on before. I recall thinking that the two strong tree trunks would frame the shot nicely – giving me a contrast between the shade and the bright sunlight beyond. I have used four stages or versions to show more of the process, and more of the options that are possible in post processing. Looking at the first shot here there is the original, which has a slight light blue tint to the sky, and a yellow tint to the water. There is a good strong variation of dark tones with the two trees, the branches arching over the top of the shot, and the actual bank at the bottom of the screen. When I took the shot into Camera Raw and applied ‘auto exposure’ there was almost no difference. The shot had not been either over or under exposed.

Fyvie loch through the trees. Two versions

I rather like the yellow tint to the water, it emphasises its difference – makes it stand out against both the shore and the trees. But I always like to see what effects I can achieve, before I settle on one interpretation of the image. My next stop was to apply a B+W conversion. Now the sky is whiter, which makes the branches and leaves clearer and a little darker against the new sky.

Fyvie loch through the trees. Two more versions

And as a final twist I applied a Faux colour action, which swaps some colour channels. I use this action mainly for the Goldie filter camera that I’ll be exploring next – but I thought I’d see what happened applying it to the original shot here. As I thought, the water is now a more ‘natural’ blue, and the pale blue tint is gone from the sky. I hope that this has given you a taste of what choices there are when it comes to processing your IR shots from the 720nm converted camera. Lots to play with!
I said earlier on “The very pale blue shots are pretty well blown out, and most probably destined for the bin!” But sometimes it is worth playing around and experimenting with the failed and blown out shots, before you finally give up on them. It’s always worth trying…
Here’s another shot from the folder

A blown out Infrared shot reclaimed

What I wanted to catch was the diagonal sweep of the leaves. The strong uprights of the trunks and the downwards diagonal sweep of the foliage really caught my attention. So I was disappointed that the result seemed past rescuing. I left it alone, reluctant to discard it completely. So I tried again with the knowledge I acquired over the last 3 years – and I think it was worth the effort and the wait. I first applied the FAUX action in Photoshop and was delighted at the increased definition it has uncovered. There are brown tints in some of the tree trunks, and gentle ‘blue rinse’ across the foliage that I really like. I then went on to take the FAUX version and convert that into B+W. It has kept the improved definition in the foliage nicely. Personally, I think there is more interest in the FAUX version, a greater sense of depth in the scene too.
So – that is a brief look into one folder – one morning spent with the IR converted old Nikon D90 – warts and all! I hope that it has been an interesting adventure for you, as it was for me.

The next article will take a look at the second IR converted Nikon I bought that year, which can produce quite amazing images that show that ‘infrared’ doesn’t necessarily mean B+W.
On to the Super Goldie

Back to the start of the IR section
My photography articles Talking Digital Photography
Flickr holds Elisa’s online Photo Gallery
© 2019 Elisa Liddell


Take away the colour? Why?

Landscape near Huntly, Scotland
Landscape near Huntly, Scotland. A misty morning in black and white

One from the archives, an early morning view travelling to Huntly, Aberdeenshire. The December light was casting long shadows, and the mist was slowly rising from the valley and the far hills. I love B+W photographs, but it still mystifies me – why is it so effective to remove the natural colour? So I’ve written about it as an article Take away the Colour trying to sort out what it is that so appeals to me. Not sure I’ve found an answer, but writing it made me think!
On Flickr you can find my B/W Tinted and Mono album
Flickr holds Elisa’s online Photo Gallery
© 2019 Elisa Liddell
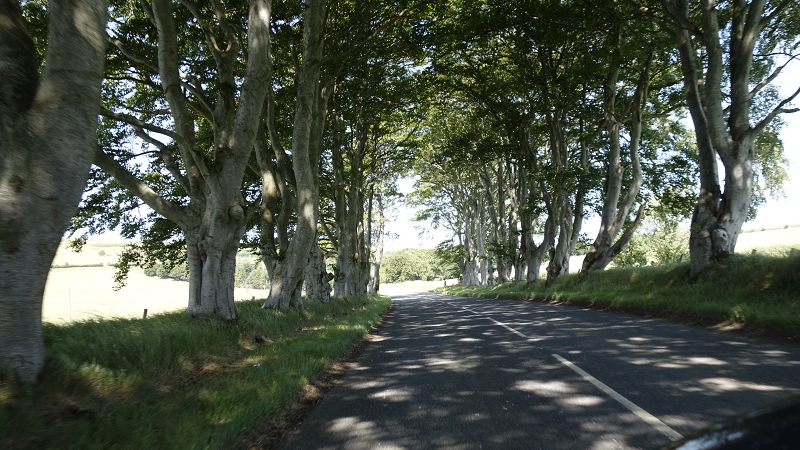
Lensbaby Art and Glass 2

Golden coins (only chocolate!)
Golden coins (only chocolate!) shot with the Double Glass optic and +4 macro filter

In my first selection of Lensbaby “art” shots I wanted to concentrate on how the Lensbaby can creatively enhance a composition – even transform it. Now I want to add some more flamboyant images! As I said … what I set out to do and what I end up with can be miles apart. Every shoot is a journey into the unexpected! The magic comes when the camera takes you by surprise! So I have compiled a small gallery of shots that have done just that – taken me completely by surprise!

A very early shot from 2013, when I first bought a Lensbaby.

Scarf ring on a bright scarf.
Scarf ring on a bright scarf. Double Glass and +4 macro filter

I took a bright colourful boa scarf and placed a scarf ring on top to help me find the sweet spot, and learn focussing. The result really blew me away! The colours, the bokeh, the swirling and zoom-type movement … wow! OK, I missed on the focus, it landed on the fuzzy wool to the left of the target ring – but what a result. I admit, I was hooked ;o)

Since then I have learned more about the powers and potential of the various optics, and how to control and use them. But they can still take my breath away. One subject that the Lensbaby is especially wonderful with is trees, and foliage.

Sunlight through trees.
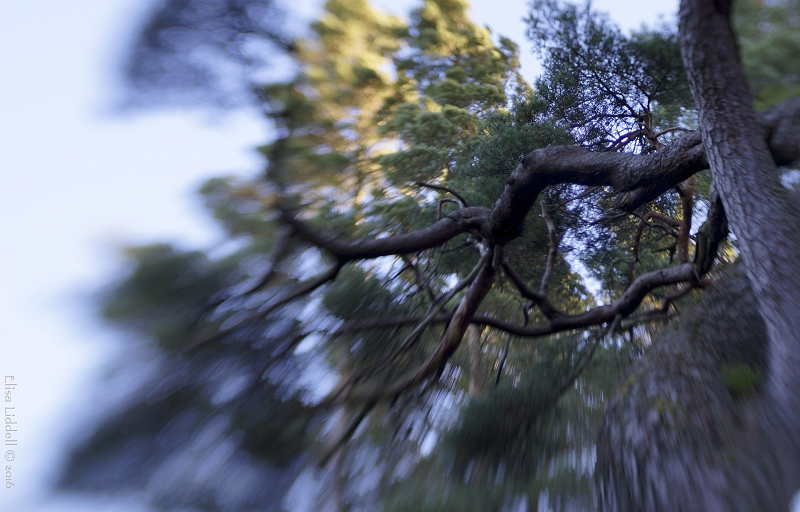
Sunlight through trees. Double Glass at F2.8 with telephoto optic

Simple sunshine through the trees at Leith Hall gardens, with the bokeh movement of the leaves. And next, looking up on a dull day, as the sunshine caught the tops of the fir trees.

Looking up through the tree canopy.
Looking up through the tree canopy. Sweet 50

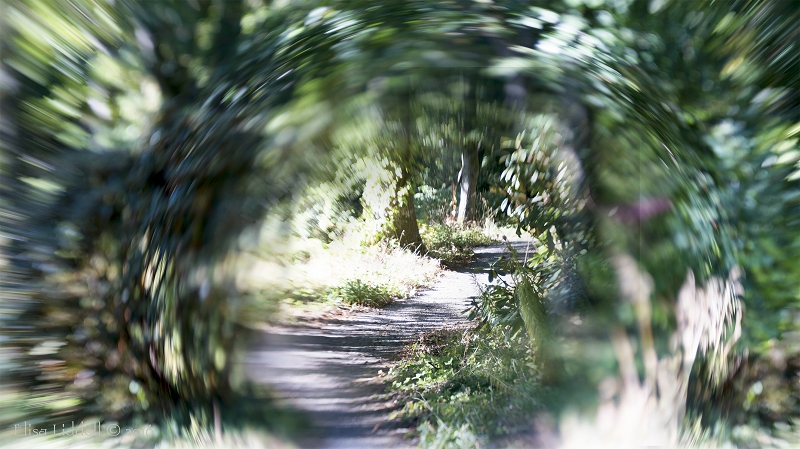
And a magical composition, combining two shots that I have described
at the bottom of the page about the Sweet 50 optic here:

tree walk at LeithHall
Walk into my world. The Sweet 50 composite of a Leith Hall walk.

It seems that handling light is one of the many superb qualities of the Lensbaby range of optics.

Blue hydrangea flowers in bright sunlight
Blue hydrangea flowers in bright sunlight. Double Glass and+4 macro filter

Here the way the optic handles bright sunshine makes for a softly melting watercolour effect. The petals become almost translucent. And the effect is achieved in camera, and not by post-processing.
Another shot where bright sunlight was handled so well by the Lensbaby

One of the old stone lions that guard the garden gate at Leith Hall.
One of the old stone lions that guard the garden gate at Leith Hall. Sweet 50

I was hiding among the branches, and trying to shoot the stone lion gate-post at Leith Hall. I thought the extremes of light and shadow would defeat the camera … but a rather haunting semi-abstract emerged.

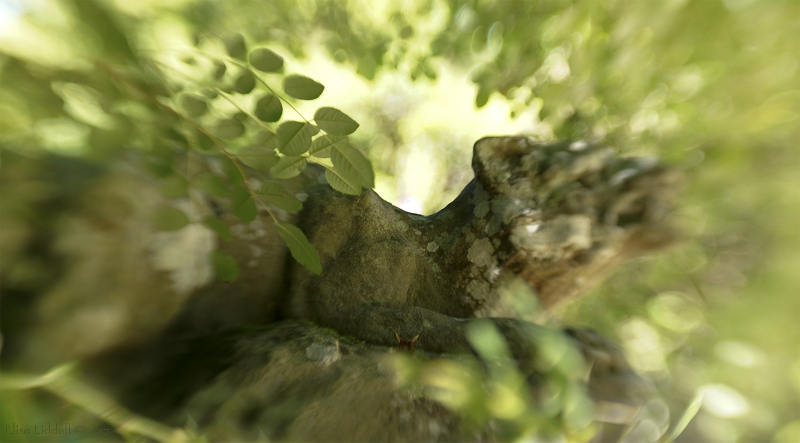
An old tree stump, caught in a shaft of sunlight.
An old tree stump, caught in a shaft of sunlight. Sweet 50

Here the sudden sunlight falling on the tree trunk, and the delicate shadow cast by the weed across the stump, caught my eye. Again, it was the contrast of light and shadow – and again the Lensbaby surprised me. No post processing was needed – just a small crop.

In all three of these shots I expected I was asking too much of the camera and lens, that the extremes of bright light and deep shadows would mean failure – but I was taken by surprise at what the Lensbaby could do!

And finally, one of my personal favourites – something the Lensbaby can do as no other lens I have, and no post-processing skills I have can simulate.

A crystal glass sphere lying among some flowers.
A crystal glass sphere lying among some flowers. Sweet 50 optic

A flowering rambler atop a wall, sunshine and a crystal sphere – and the Lensbaby. Unexpected magic ;o)

I’ve got more Lensbaby shots on Flickr. I’ve divided them into the 3 lenses I use
Double glass optic:
Sweet 50 optic:
Edge 80 optic:

I hope that you have enjoyed this personal journey through 5+ years of my “living with the Lensbaby”. I have enjoyed looking back, and now look forward to see what new surprises and delights it can offer me ;o)

Flickr holds Elisa’s online Photo Gallery
© 2019 Elisa Liddell