
Playing with the White Balance and exploring effects you can get.

A normal day, a normal situation – too little time, a sudden precious few minutes of sunshine. Grab two familiar cameras and start shooting!
The next day I open up the folder of shots, and I begin to think. What to make of what I’ve shot? Should I just junk them all? Not more flower shots!! I get angry with myself. Why am I always rushing? Why can’t I be like a ‘real’ photographer, and take my time, create the set, plan and measure everything, study the subject and then produce the perfect photograph?
Well – I’m not like that! Life’s not like that! OK – MY life’s not like that ;o)
Maybe I am just a butterfly flitting from idea to idea – not settling anywhere (oh how the criticisms of early years shape our self-image). I will dip into a learned tome on photography, on Photoshop, on so many things … and I find an idea or a piece of information, and I stop, absorb it, and run with it. The book isn’t finished, the tutorial sequence isn’t completed … but the single small nugget I’ve found stays with me and grows! Maybe it is time I accepted that this is who I am and how I work, and make the best of it, rather than fighting it.
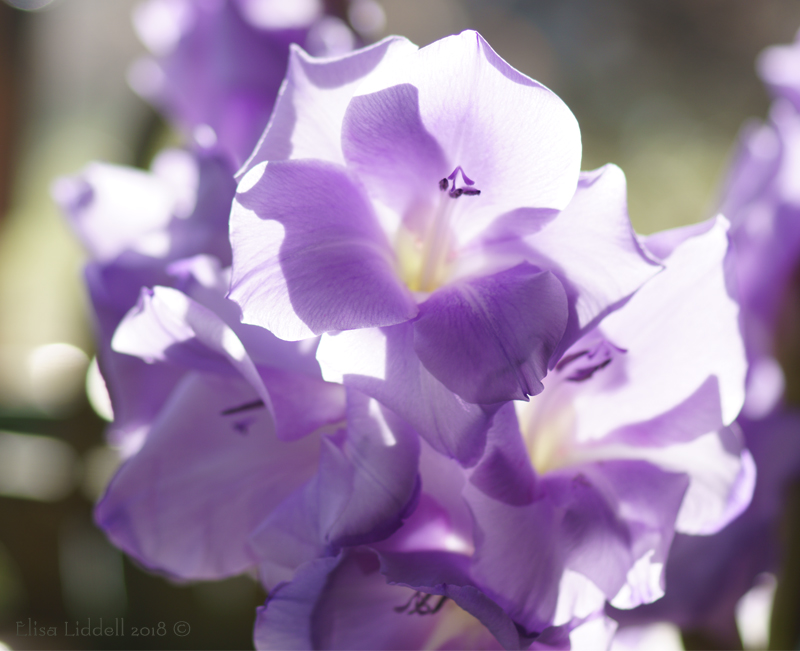
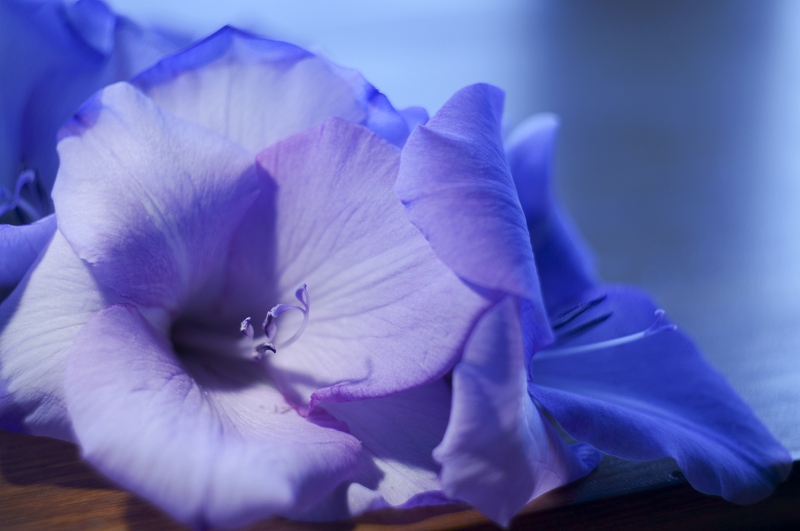
Yesterday the subject was some delicate gladioli stems.

The colours are so beautifully subtle, ranging from blue to purple, with hints of pink in there, and yellows in the centre. As the flowers open the colouring changes subtly, lightening gently.
But in the strong sunshine the light petals bleach out, and the camera struggles, like this.
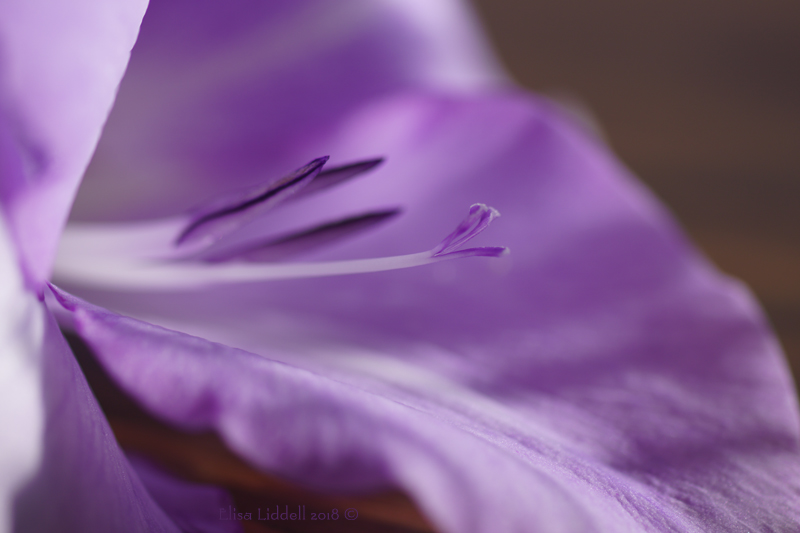
In the cramped corner of the window I can’t step back enough to get much of the stem into my shot. The sun is moving round, away from the window, and will soon be lost. Maybe I will find one shot that pleases me?
I get in closer and keep shooting.
Then I change camera and lens and take more shots – I’ll check them out another day. I need to hurry before the light vanishes, or other duties call. A familiar situation!
So! Back to the folder I have just opened today, as I am writing this. In this calmer ‘morning after’ situation I can see if there is anything worth keeping.
And what strikes me is the range of colours that I have caught. Trying to catch the subtle colours of the petals I have been unconsciously experimenting and playing with the lenses and the two cameras.
And I found myself playing with the White Balance in a new way. Why not? Why set it to ‘Bright sunshine’ and leave it that way? Why not try it on fluorescent?
It’s not something that I’d wondered about before. Usually I tweak the White Balance (WB) in Photoshop if I need to. But playing about with it, intentionally, in camera, while shooting is a new idea – well, a new idea for me!
But before I throw away the rule book – a quick look at what the post-production manipulation of the WB can do for the light-challenged photographer.
I’m not a professional, I don’t have a massive array of lighting options and choices. Mainly it is me, the natural sunlight and a modest array of lamps and torches. I do have a small Lightbox, which is ideal when you want NO cast shadows – but I like to use the drama of light and shadow whenever possible. So, for me, the WB is a constant problem. I usually need more than one light source, and as soon as I start mixing light sources I find that some give a yellow cast to the shot, while others (especially LED) will give a blue cast. Add natural sunlight into the mix and there is a difficult balancing act that will doubtless call on Photoshop!
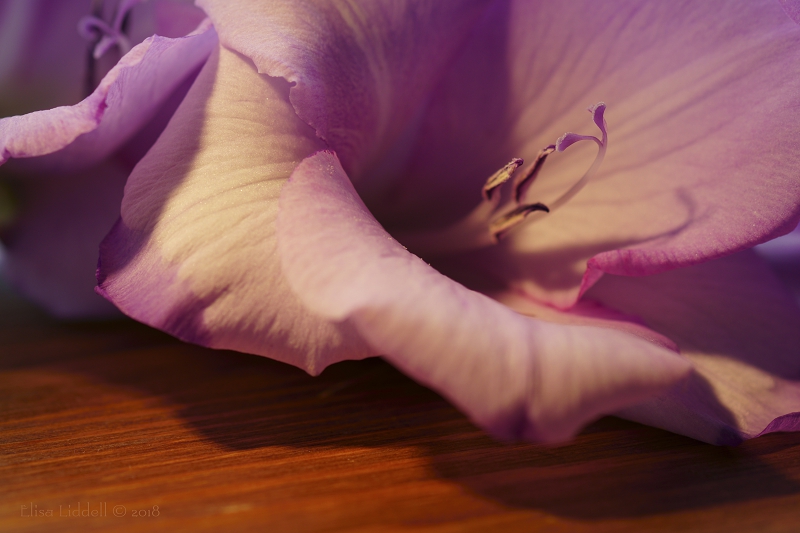
A couple of quick examples. As the sun went behind a cloud I needed to add a small directional light to illuminate the petals. But it gave the entire shot a yellow cast

Fingers crossed that Photoshop could come to the rescue!
It did! But the white balance that suited the flower made the background a cool blue. The shot is getting there, but I’ll need to paint back in some of the warmth of the wood that the flower is lying on!
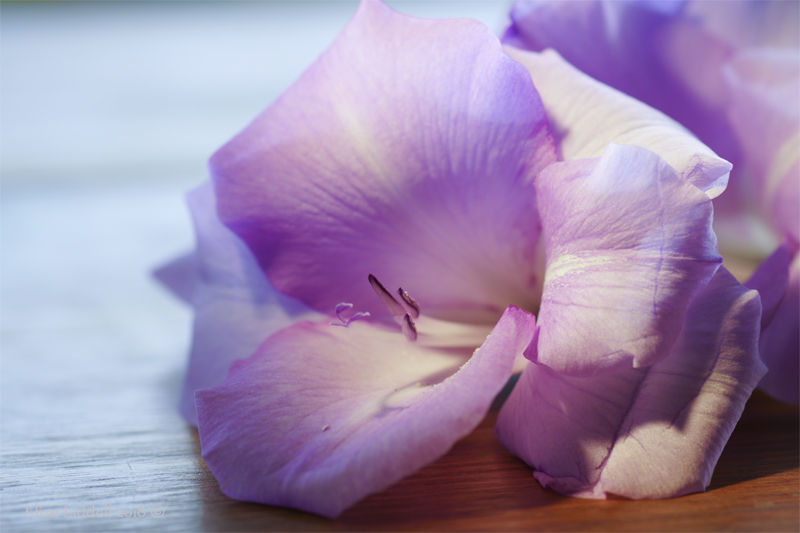
A second shot that I like, has the same problem of the additional light giving a yellow cast
This time the adjusted WB did the job very well! There are pinks in the petals, and the blue in the background flower works rather well too.
In both examples the brown wood remains clear and allows for good deep shadows.
So there is no doubt in my mind that adjusting the White Balance after the shoot is an essential part of creating the image that you want to achieve. And for me that means Photoshop (or Lightroom) and Camera Raw. Camera Raw is the first stage of processing a shot and fundamental adjustments such as WB can be made easily and quickly. Camera Raw is a separate program, but linked to Photoshop itself. After you have made your choices in Camera Raw you can then open the adjusted image in Photoshop and work on it. I usually choose to open the image from Camera Raw as ‘Object’ rather than ‘File’, as this means I can jump back to Camera Raw if I need to change any of the basic adjustments I made. That is really cool!
Once in Camera Raw the general menu down the right side offers you WB as the top choice. You can choose
• As shot (leave it alone)
• Auto (Photoshop makes the choice for you)
• Custom (use the sliders below to adjust Temperature and Tint until you are satisfied)
A sample shot in Camera Raw:
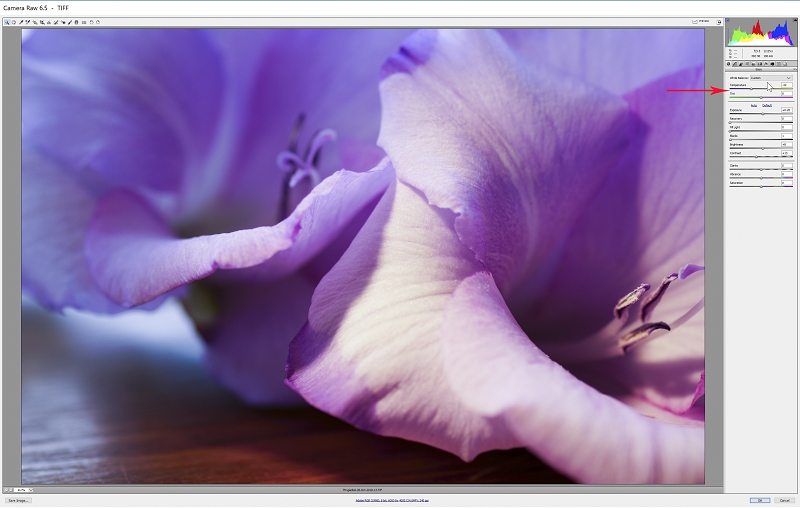
With this shot I chose Custom settings: temperature -32 and Tint 0 to neutralise the yellow cast.
The shots I have used so far were all taken with the Sony A772 camera body, and the Sony 100mm F2.8 tele-macro lens. It makes for a large and heavy combination that isn’t easy to handle, but is a dream to use as it can adjust and focus over a wide range of close-up situations.
Extra info: The Sony 100mm F2.8 Macro is a medium telephoto prime macro lens. It has true macro magnification of 1x and the added beauty of smooth bokeh in out of focus backgrounds. I’m told this has something to do with the 9-bladed circular aperture diaphragm.
Another go-to favourite lens of the moment is the much smaller and lighter combination of the Sony NEX-6 body, and an old Russian Helios 44-2 lens. There’s always a positive and negative side to any lens you choose. The positive with this lens is the rich, soft colours it can produce, and smooth backgrounds and glorious bokehs. The negative side is that this is an old lens made way before digital cameras and has no image-stabilisation for hand-held use, and no way to access the camera’s own computer. Mine has the added challenge of being frozen at F2.8. For me that means ‘foot focusing’! But I get some of my best close-up shots with it. Oh. And its age means you need to be willing to shoot in Manual mode.
A Flickr album of my shots with this lens is here: if you’d like a look around.
So, in a situation where time is short and the light constantly changing, this lens is going to be slower, as there are more adjustments needed for each shot. I decide to trust that I’ve already got a good shot or two from the tele-macro, so let’s play around a bit with this lens. I need the additional light, and all the same yellow cast is showing through the view-finder when I choose Daylight WB, so what the heck?!
Spin the WB dial, and let’s see what pops up. Incandescent? Fluorescent warm/cool/Day white? Go through them and see what looks interesting. This one has a nice rich blue effect with Fluorescent warm
The next one has a gentler blue cast, with more pinks showing. I think this was Fluorescent cool.

Both are interesting variations to add to the final tally of shots.
Then spin again and get Day White Fluorescent.

This time the sun was strong enough to turn off the artificial light. But the gentle colour values were really lovely, and the background bokeh was nice too.
So, what have I learned from my morning with the gladioli? I guess, that there is a time to throw away the rule book, and simply play with your cameras and lenses. OK we all need to learn what the White Balance is for and how it works – and how we can manipulate it after the shot is taken. But once we free ourselves and have full manual control of the camera – then the fun can really begin.
And another thing that I am learning all the time is that every lens is different, and you can learn so much about what it can do for you just by playing around with it. And of course, put a lens and camera body together and a magical relationship is possible. Move the lens to another body and there is a whole different experience. I’m sure you’ve got favourite combinations of lens and body that work for you …. I do.
And most of all have fun!
PS. All the shots I’ve used here are SOOC, I haven’t adjusted them at all, not even a crop, unless stated and shown.
Flickr holds Elisa’s online Photo Gallery
© 2019 Elisa Liddell