
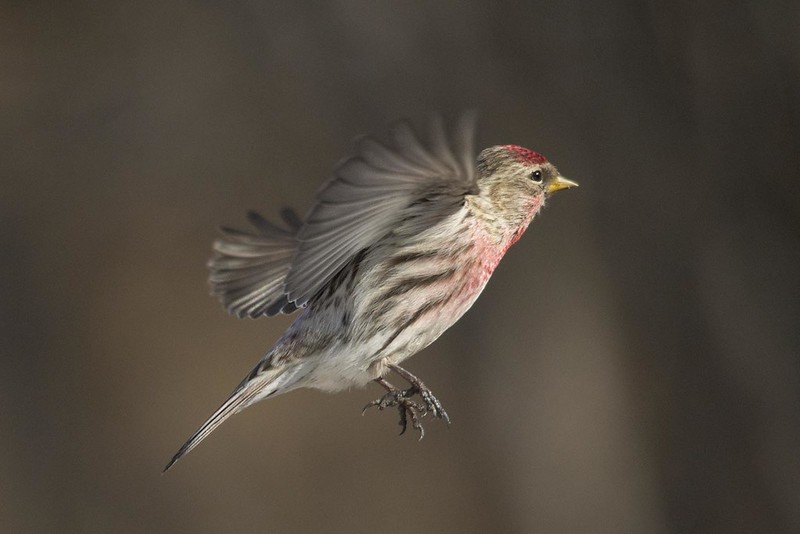
Flying Solo is how I think about using the full Manual setting on my digital cameras. There is a freedom that is so well expressed in this photo. It was taken by my good Flickr friend Jan Timmons; her Flickr photo gallery is here and a larger version of this photograph is here. Like learning to fly there is a learning process, but it is well worth it to be able to have your camera do what you want, rather than cruising along on Auto-pilot!
That’s how I thought about it when I wanted to use my new DSLR camera on Manual rather than letting the camera computer make all the decisions for me. After all, I’d paid a lot of money for my new Sony NEX-6 – I didn’t want to use it as a glorified ‘point-and-shoot’. So I bought a magazine, and then a book – and started trying to figure it out. I wanted to be sure of what I was doing; I had a sneaking suspicion that maybe I wouldn’t be able to undo it all if I got the settings wrong!
I looked at the charts, I read the explanations, I tried to learn the settings. I wasn’t very successful! Somehow the charts seemed to make sense until I tried to take a shot. I had the books beside me when I tried to shoot on Manual. Which button did what? Where were the buttons? It was all a mystery and a confusion to me. I felt it wasn’t going to make much more sense to read the magazine sections yet again!
That’s when I joined Flickr. I was scared by all those knowledgeable people who would doubtless laugh at this ignorant newbie – but I so wanted to be in control of my camera, and I needed help and advice. A lot of serious Flickr members will post the technical information that goes with the shot (called EXIF data) so I could see a photo and the EXIF to help me learn. And for me DOING is always the only way to really learn. READING will only take me a little of the way! I did find some very handy little charts online, and gradually picked up important pieces of information that have stuck in my memory and that I use all the time.
So this article is all about the extremely simplified way that I devised to start taking off on my Solo flights. I’ve found or devised the most simplified charts and visual aids, to make sense of it all. I hope that it can help you if you are in the position that I found myself in :o)
The bits that really matter for taking control of your camera are:
White Balance
ISO
Aperture (F stop)
Shutter speed
Manual Focus
The EVF
The ‘how-to bit? Well, I rely heavily on the electronic view finder (EVF), which is much, much better than the LED screen at the back of your camera. That is unreadable in sunlight. The EVF can be adjusted for your eyesight; it has an eye-cup to help shade from the sun; it gives you a colour view of what you are shooting; and what you see is pretty close to what you will end up with. Every element of your Manual settings can be seen in action and that makes a HUGE difference! So get a camera with an EVF, and even look online for opinions as to whether it is a good EVF. You can get one as an accessory for some cameras too.
So – to get practical :o)
If you are indoors and can see the LED screen clearly, use that to start with – the screen is that bit bigger. Select your LED/EVF display setting to show the settings you want – you can scroll through the display options. You want to have ISO, F-stop/Aperture and Shutter-speed – White balance if possible too. That way you can get used to the settings, how to get to the buttons you need, and how to read what the settings are that you have chosen. My references mainly refer to my small Sony NEX-6.
White Balance (WB)
This is where the camera decides what the lighting is like. There are several settings:
Natural light – daylight, shade, cloudy
Artificial light – incandescent fluorescent, Flour warm white, Flour cool white, Flour day white, Flour daylight, Flash
The camera on auto will judge for you which setting will give you the closest colour values to ‘natural’. So if you look at something, and then look again through the EVF you can judge whether the green leaf is the same both times – and your White Balance is right. Quite a lot will depend on your camera and your lens. I find that sometimes a ‘Cloudy’ or ‘Shade’ setting works better even in bright sunlight … let your own eyes become your guide. If something proves to be wrong you can always adjust it on your computer later!
I’ve written about playing with the WB here You can have fun playing with this setting, and get some quite different colour effects. But for starters just get used to looking to see if the colours look right to you.
Now the BIG THREE
ISO, Aperture and Shutter Speed. I put them together because they all work together and influence each other – so it helped me to thing of them as one system. The camera, like the whole of photography, is all about the light. And these three together affect how much light gets into the camera when you shoot.
ISO settings are usually in 100 steps from 100 to about 25,600 – the range varies. Put your camera on, and look for the ISO button and try moving it up and down as you look through the EVF. The bottom of the range (100) should be the darkest (some cameras go lower) and as you move up the numbers you will get lighter and lighter. That’s what ISO will do.
F-Stop settings actually open up the aperture (hole) in the camera to let more light in. Just to be awkward the numbers are the exact opposite of ISO. Here the smallest number lets in MOST light, and as the numbers get higher the aperture closes, and less light gets in!
F-Stop numbers usually range from 1.2 to 22.
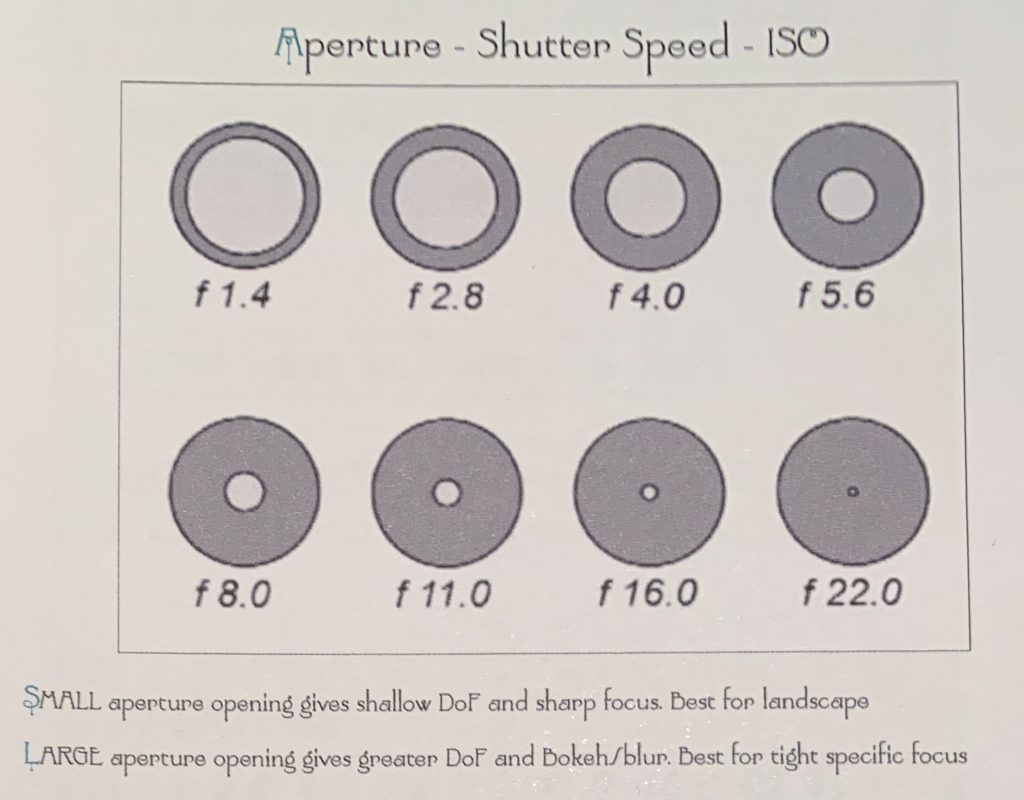
Other things are affected by the F-Stop, but for the moment just find the Aperture/F-stop button or dial and get used to moving it and seeing how it too will let in more or less light.
Shutter Speed is the final one of the ‘big three’. At the lowest setting it is on ‘Bulb’ which allows you to time a Long Exposure shot, then timed from 30 seconds up to 1/3 where the +ve seconds begin. The speed is now in fractions of a second going faster right up to 1/4,000th of a second. Needless to say the Long exposure shots will need a tripod! Round about 1/10 handheld is quite easy with today’s image stabilising software. Shutter speed is another one where the lower the number the more light is let in – the higher the number the darker the image through the view-finder.
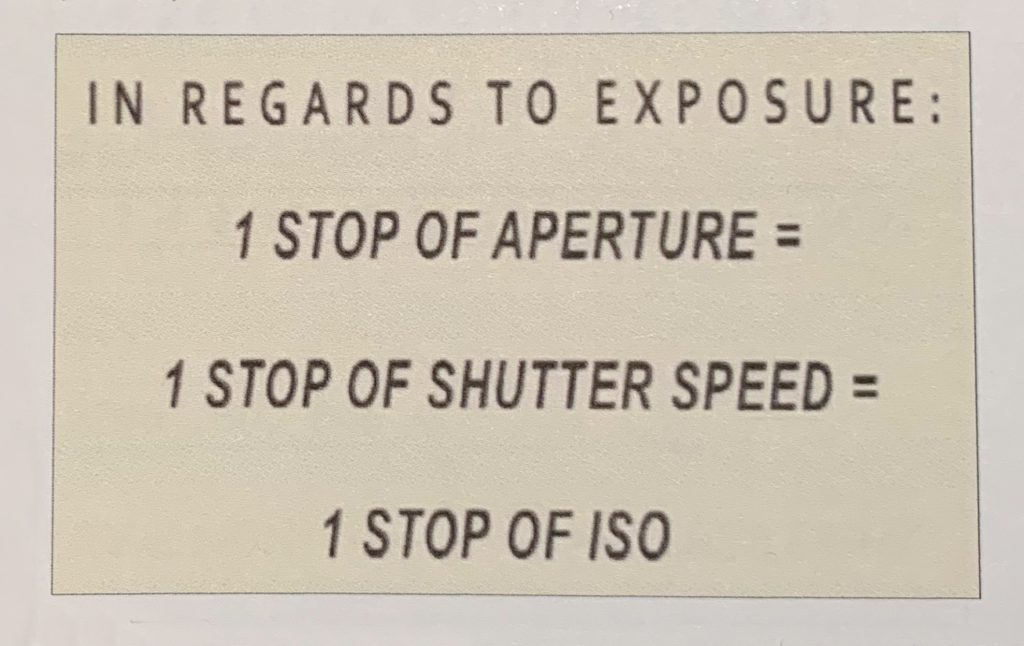
These are the BIG THREE because when you put them together you can work out a balance between them.
This is how they affect light entering the camera
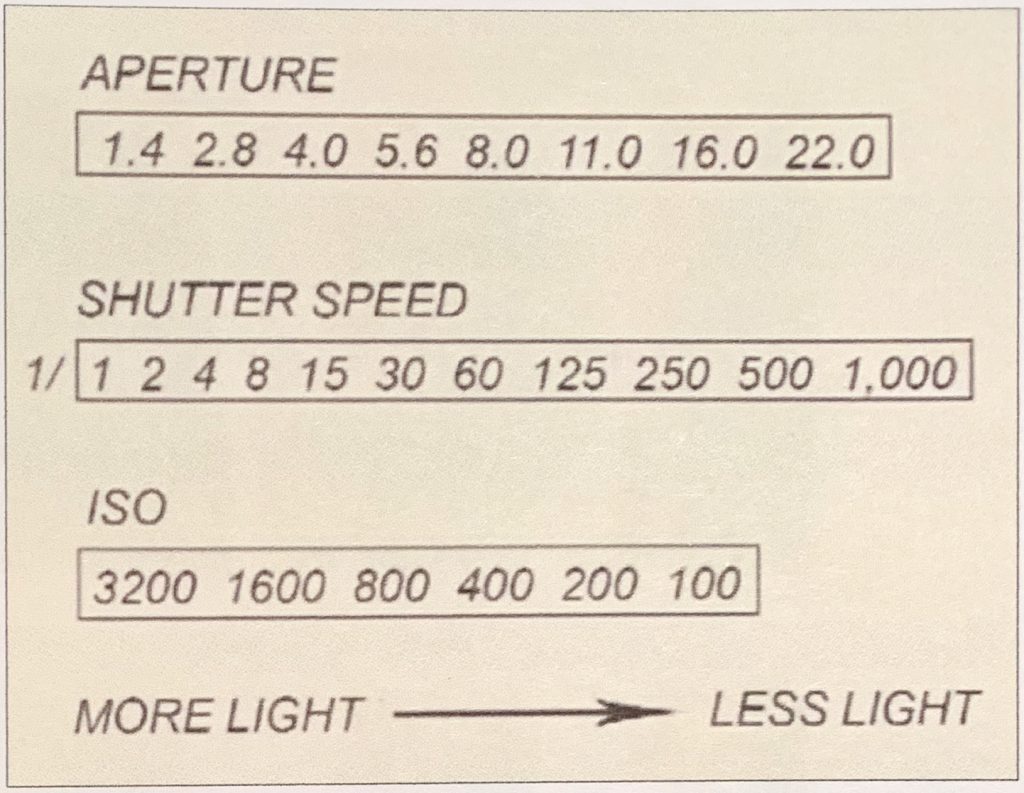
And this is how they interact. Move one of them and you can get the same light by sliding one of the others to compensate.

It sounds complex, but in fact it isn’t as bad as it sounds at first! Just remember that moving one stop of any of the Big Three can be compensated for by adjusting one of the others.
It sounds complex, but in fact it isn’t as bad as it sounds at first!
To take an example with my NEX-6. It works best when the ISO is low. A high ISO always gives ‘noise’ – a grainy speckled look to the shot. So for me my first thought will be that the lowest ISO I can manage will be my best choice. But what if the lighting is low and I can’t change it? To get a good shot I might need to slow down the shutter speed so far I’ll need a tripod.
Or if I am shooting a bird in flight I might need speedier shutter speed. So I have to balance and make the best combination I can. I have one lens that is frozen at F2.8. That means I have to work with both shutter speed and ISO when I use that lens!
There are other things that you’ll think about when you get used to the Manual system. But first of all I would suggest that you stick with your kit lens that came with the camera body (usually it has a modest zoom of 18-55mm) and just play around and get happy with flying solo!
The final element you need to fly completely solo is Manual Focus.
Manual Focus is just as much a part of flying solo as as the other three elements. You are in charge of making the shot, and where you want to focus is part of that decision process. Most cameras will have some visual aid to help you, that can be seen through the EVF. It might be just a sound or a small square that lights up green when the point of focus is achieved. My Sony NEX-6 has a very useful additional aid called Peaking Level. This shows the point(s) of best focus highlighted in colour. You can set the colour (red, yellow, white) according to what you are shooting, so it can be clear. You can also set it to low, medium or high intensity.
The example here is not the best example – I took it using one Sony RX100 hand-held to shoot the LED screen on another RX100 (also hand-held) but hopefully it will give you the general idea! You can find a whole lot more about Peaking if you search online.

This is so helpful! It gives that added aid to precision focusing. The second additional focus assistance that Sony offer is Manual Focus Assist. This automatically zooms in on your image between 5x and 11x to help you achieve maximum sharpness. It is wonderful for Macro photography . When I start to rotate the ring on my macro lenses (I have three!) the MF-Assist jumps to attention, and I can find my point of perfect focus easily. Then a second or two later it will return to the ‘normal’ view in the EVF.

Settings – Manual – F2.8 -shutter 1/164 – ISO 50 – WB daylight
Here’s an example of the combined result of using manual focus. Firstly, if I had left this shot to the in-camera auto-focus it would focus on the closest object – which would be the parts of the petal to the extreme left of the shot. But I wanted the focus to be on the delicate stamens and stigma – those elements are also centrally placed. So I can adjust the focus Manually to concentrate on the stamens – and as soon as I start to adjust, the M-F Assist takes me in much closer so I can have pinpoint accuracy. When the Peaking colour lights up the elements I want, then I can take the shot with confidence.
An additional point to notice is that shooting at F2.8 means that I can get in really close, and the areas that are out of focus are gently blurred. One of the pleasures of shooting with a Macro lens ;o)
So now you have total control of your camera, and you can use it in whatever way you want. The Auto settings are designed to take the ‘best’ possible shot, balancing all the elements the camera sensor can judge. But there are so many ways in which you can use the power of the camera to create something quite different from the ‘balancing act’ that the on-board computer is set to judge as a ‘perfect’ shot.
Here is one example of how you can stretch the possibilities of your camera and lens. I was shooting a small hydrangea in bright sunshine. I loved how the sun was bleaching the flowers, melting the petals into bright white background. I didn’t want the camera to try to compensate for the brightness of the light – I wanted to use that brightness.

And that is just one small example – another is explored in Playing with the White Balance, which looks at what you can do when you take control of the WB and ignore the rules.
And finally – what is to me the wonderful reward of getting to grips with full manual mode – the range of vintage lenses that you can now use with modern digital cameras. Some of them are from the 1960s or before, and are wonderful lenses producing lovely images. And not expensive either. But you need to be able to use your camera in manual mode as they were produced before cameras had on-board computers. So far I have collected 4 such lenses, and rate them as among my greatest favourites. So have a go – get flying solo and take to the skies.
Flickr holds Elisa’s online Photo Gallery
© 2019 Elisa Liddell