
Back to Basics 2 – It’s all about Light
Asked the question “What is photography all about?” my answer would always be “Playing with light”. Whatever the subject, whatever the location, whatever the season, for me it’s all about the light!
At the simplest level of course the light is supreme – no light means no sight, so no photography either. Try taking a shot with the lens cap on! So the camera, like the human eye, responds to light. But don’t for one moment imagine that the camera sees in the same way as the human eye. No!! The human eye is way more complex, intricate and wonderfully subtle. Even the best camera pales in comparison. Just as the computer is a tool we use, but (hopefully) recognise its limitations, so the camera is a machine that we can use to capture and communicate our own vision. And understanding what the camera can and can’t do is what photography is all about.
As so many prepared meals suggest on the packaging …. “For best results….” at this point I have to say For best results…. use a camera that you can operate in full Manual Mode, and preferably with interchangeable lenses. I’m talking digital cameras here, as they are what I use.
You can do quite a lot with a camera that relies on the onboard computer to control the settings ‘for best results’; the next step is to use the pre-sets, where one setting is available for you to alter – but if you are going to use your camera to communicate what YOU see and feel and want to express, then no computer algorithm can do that … only YOU can!
The human eye is not the only amazingly complex element here – what lies behind the human eye is the human brain. And it is your eye and your brain that are seeing, responding and capturing the shot. No camera computer can approach the power of YOU. No computer, however powerful, can approach the complexity and subtlety that is you, or me, or any other person.
So – back to the LIGHT.
The camera has several settings that control the light. ISO and Aperture are the two main ones, that together control the amount of light that enters and hits the sensors. There are lots of online guides to how these two work. Then there is Shutter speed, which adds the third setting, making up the magic trio. Together these can ensure that the right amount of light enters the camera to reproduce, as nearly as possible, what your eye sees. Play with these three settings and you will learn what settings suit your camera, the lens you are using, and the light situation you are working with. Personally I try to keep the ISO as close to 100 as I can, as high ISO can cause ‘noise’ (like tiny dust particles) across the image.
There are shooting situations where you have little control over the available light.
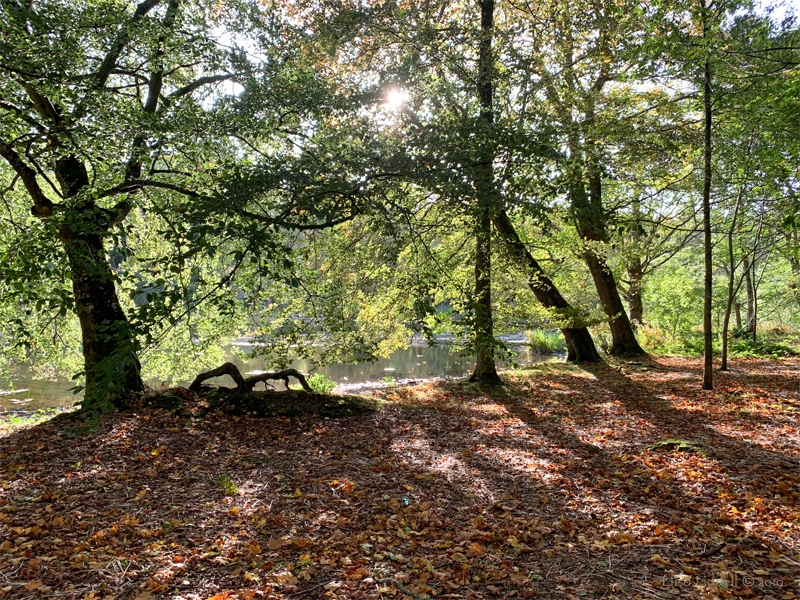
When shooting outdoors, especially shooting landscapes, nature provides the light source, and you have to work to nature’s pace and settings. You can choose the time of day to shoot, dawn and twilight are favourites with photographers. But storm clouds, dull, sunless days, bright sunlight, rain, mist, sleet and snow … all offer opportunities that you can grasp. But what turns up on the day when you are finally free to go out with you camera? That is in the lap of the weather gods! One thing is definite, the light will be constantly changing, and nature will keep you on your toes ;o)
The Impressionist painters learned this the hard way too. Before them painters would sketch outdoors, and add colour notes, then paint in the studio with the soft even northern light that art studios provide. But the Impressionists wanted to paint outdoors ‘en plein air’ to catch the real fleeting impressions that we all see. The artist Monet is famous for his water lily paintings done in his garden at Giverny – but before that he painted several series of the same subject, recording the changing light throughout the day. He did this with haystacks! Just how much can you ‘say’ about a haystack? Monet wanted to record the different light that fell on the haystack as the light changed throughout the day. Imagine his row of canvases, and moving between them as the hours passed and the light changed. He revisited the subject again and again, so the final body of work (some 25 canvases I think) spanned the changing seasons too.
As photographers we grow with the realisation that revisiting a subject or a place is not a boring repetition – each visit has its own freshness, each is different in light, time of day, season, and also that intangible but vital element, our own mood, frame of mind, feeling! And the light? It is ever changing, never quite the same, as it falls on the subject, as we change our position, as some particular detail catches our eye.
And there is more choice, increasingly more, as technology advances. Here we need to encounter the fourth element in the Manual Mode grouping, and the one I have saved to last – the White Balance (WB). This attempts to ensure the whites the camera produces in any given shot get as close to white as possible. In the range of natural light there are several settings, from daylight through shade to cloudy. Then you move on to the artificial ones – incandescent, fluorescent warm white, flour. cool white, flour. day white, flour. daylight, flash, and some custom settings too (these settings are taken from my Sony cameras, they may vary for different makes).
So what about indoor shooting and using artificial light?
This is where the WB range of options comes into play most clearly. From natural light enhanced by candlelight we have arrived at a point where we have a wide variety of artificial light sources. I shoot a great deal of the time indoors. There is natural light available through the windows, but I also have a growing array of small lamps, LED lights, torches and more. Each artificial light has a colour cast, a tendency to ‘distort’ the colours, especially noticeable in the whites. The most common colour casts are yellow and blue – just think of sodium street lighting with its orange tone. Add these to the natural sunlight choices, and you have a real problem for the camera’s White Balance settings. I make almost impossible demands of my cameras, as the sunlight most often provides a form of back-lighting, and I need to add ‘fill lighting’ as the camera responds to the sunshine, and darkens the front of the objects I am shooting. So I usually need to mix natural light with an artificial light source!
Luckily today’s cameras have excellent Electronic View Finders (EVFs) or Optical View Finders (OVFs) so it is possible to run through the WB choices and choose the one that gets closest to the colour values you want. And there is always the chance to adjust further once the shot is on the computer!
Note: I use Sony Cameras, so I refer to the Electronic View Finder (EVF) but some digital cameras use an Optical View Finder. My shorthand will be to refer to EVF.
So there we have the basic elements of handling light in Manual Mode. And these settings provide us with the main tools to get out there and shoot the light!
Let the adventures in Light begin!
Shooting with natural light
Shooting with artificial light
Shooting with a mixture of light sources
The elusive Bokeh and lens flare
Back to the Zen Camera cover page
Flickr holds Elisa’s online Photo Gallery
© 2019 Elisa Liddell