

or “Adventures in the Infrared wonderland – part 1”
I’ve written about my reasons for wanting to shoot or process images in B+W here and I ended the piece with these words; “Infrared is rather like ‘Alice’s Adventures in Wonderland’ – it is a whole different world, just waiting for us to explore down the rabbit hole ……”
I wasn’t joking, and I don’t think I was exaggerating either. Infrared can take us beyond the way that our eyes see naturally. Our eyes have been developed to see only part of the light spectrum. It’s not news to us – we all know there are X-rays we use to see inside the human body, getting beneath the skin, and seeing what the naked eye cannot. And we know there is ultraviolet light that can damage the skin, and we protect against it. Then there is our focus of interest, infrared light. Another part of the light spectrum that we cannot see with the naked eye, but another one that the camera can be adapted to ‘see’ for us.
We tend to think of these invisible light bands in scientific and medical situations, to help with a diagnosis, to perform a ‘virtual’ autopsy on an ancient Egyptian mummy, to see beneath the paint to verify an art-work. The uses of infrared light are many – the most ‘everyday’ is probably to be found in the remote control for your TV. But we can also use part of the infrared light spectrum in our personal photography – and reveal the world in a very different way.
I first came across infrared (IR) photos in the B+W groups, and, ever curious, I started to explore! When processing a colour shot into B+W in Photoshop there is a drop-down menu of options for you to try applying to your image, and among them is infrared. The perfect place to start! The journey had begun ;o)
But I was disappointed in the results I got. They didn’t look very different to the B+W options.
Indeed, when I posted this shot on Flickr no-one realised it was infrared processing!
And as I continued experimenting, I found that using IR conversion in Photoshop often produced a grainy effect – degrading the quality of the image. An old shot of crab apples with autumn leaves can demonstrate what I mean by the disappointing degradation of the image.
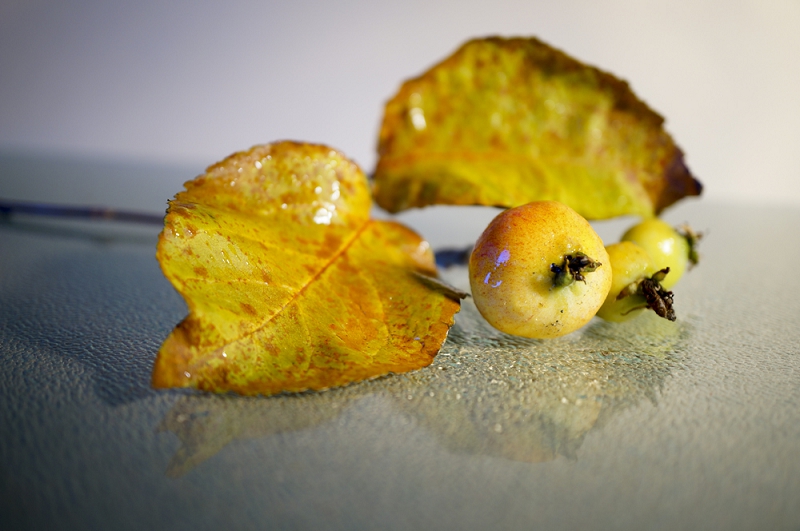
I often take old images from my archives, and see how they look in B+W. Here a simple conversion gives smooth greys with the raindrops on the leaves even clearer than on the colour version. And there are white highlights and black spots too. So it is a pleasing, balanced conversion.

But try the infrared option in Photoshop, and even after adjusting every slider possible, the very best I can get is this.
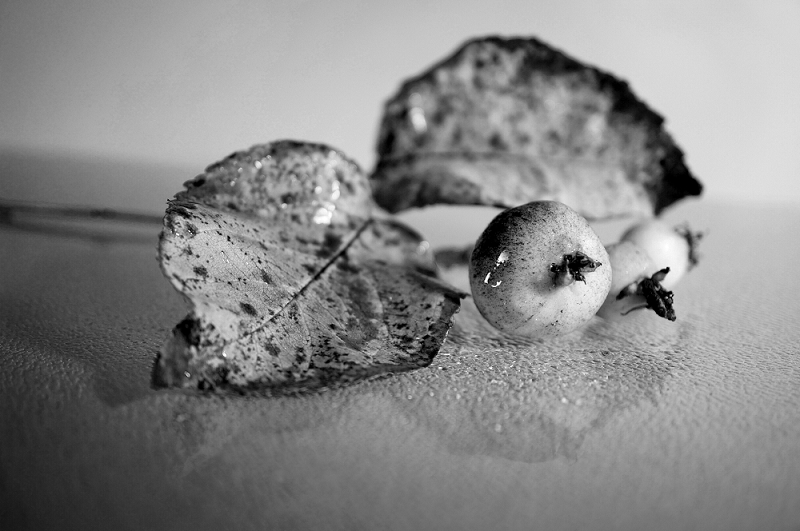
This is most definitely not what I had seen online. The results I saw there were inspiring!
So maybe Photoshop was not the way to go. What about trying a filter on one of my Sony cameras? I’m a huge fan of Sony, especially as I understand the on-board computer – something that turned me away from Nikon. An experimental play with a filter sounded good. But no – there were several articles mentioning that Sony was a really tricky choice for IR filters, and maybe for IR conversions too. Disappointment loomed! Then I came across eBay and found a seller in the UK who had modified old cameras so they would shoot ONLY in IR. And the old cameras were the Nikons I had used years ago! The sample shots looked exciting, so I decided to take a chance and see what happened. After all I could re-sell the camera on eBay if I found I’d made a miserable mistake.
Looking back, I think I really lucked out! I knew nothing about IR at all, but my first buy was ideal for me. I didn’t know it then, but there is a broad range of filters that give differing effects – and I bought a gentle filter that emphasises the delicate greys, rather than a harsher B+W filter. So early in July 2016 I bought an old Nikon D90 with a 720nm filter. The pixel size is small (4288×2848 pixels) compared to the cameras of today and the technology couldn’t touch my pocket RX100 (5472 x 3648). So I was wary about the gamble. The Nikon was all set to go, with an instruction sheet to help me. I attached the lens I’d been advised to use and tried it out.
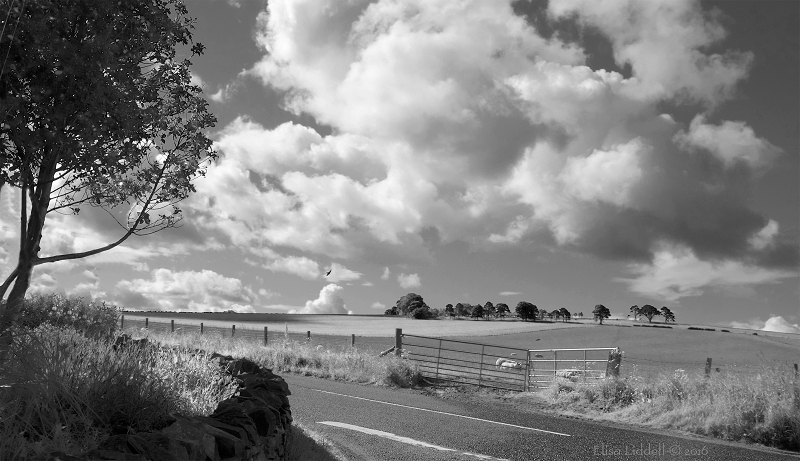
Nothing fancy, just a few shots of the garden and the view across the howe (valley).

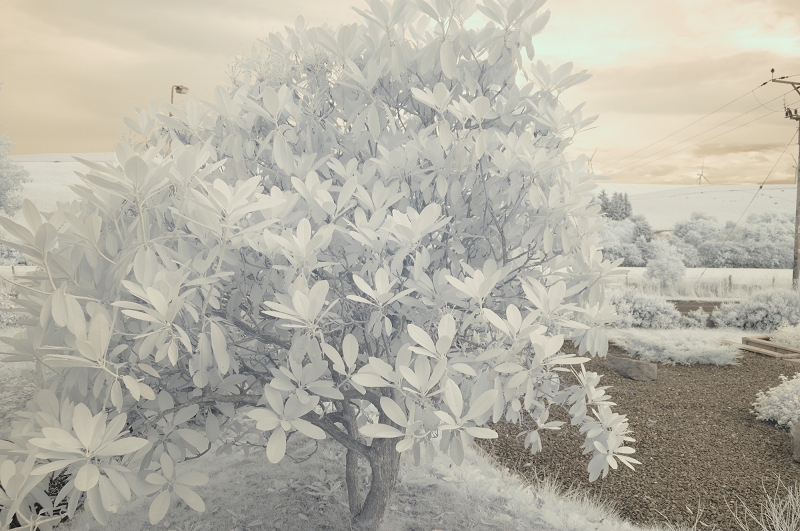
Yes! That was the delicacy I wanted in the leaves – and I felt I was on my way!
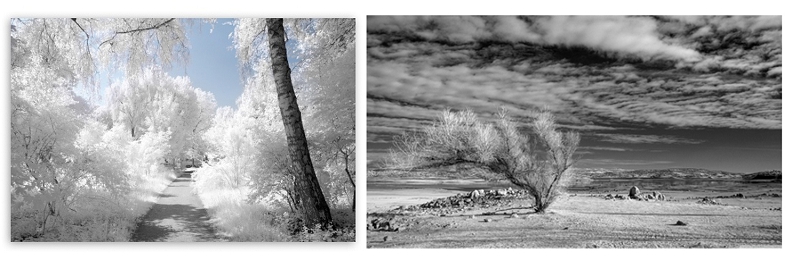
Of course, now I would do a little editing to the faint colour cast and maybe choose something like this …
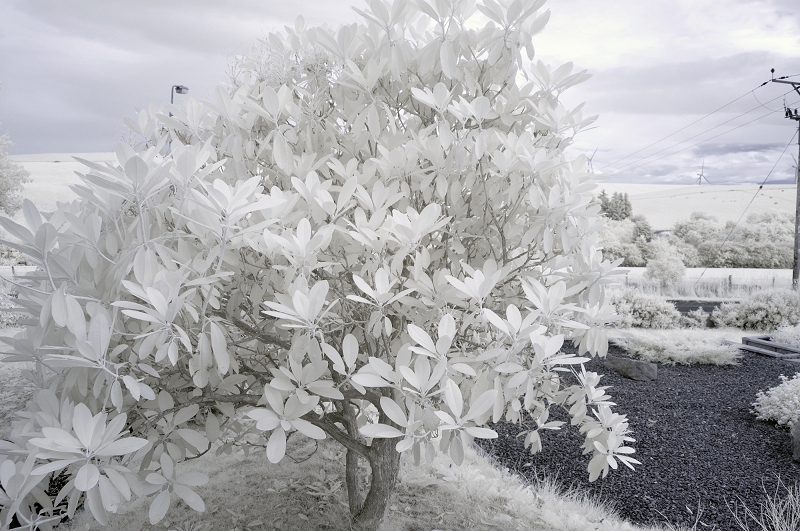
This was what I wanted – what had attracted me to infrared photography that I had seen online and on Flickr. I knew I had the place to start from – to explore this whole new way of looking at the world around me. The adventure was beginning ….
On to part 2
Back to the start of the IR section
My photography articles Talking Digital Photography
Flickr holds Elisa’s online Photo Gallery
© 2019 Elisa Liddell