

Adventures in IR Wonderland 6 – the Goldie 8 FAUX
As I mentioned at the end of the previous section, I have recently found a second FAUX action for Photoshop. I couldn’t leave the subject of how to handle your Super Goldie shots at the post-processing stage without taking a look at this option. The action is free, and you can download it from the Photoshop Supply website. The actual page where you’ll find the zip download is here . There’s lots of information on installing an .atn file, colour channels, inversions, and what you can do with your IR shots.
I thought I would experiment with the action and see what it could add to the range of processing that I currently use with my Goldie IR shots.
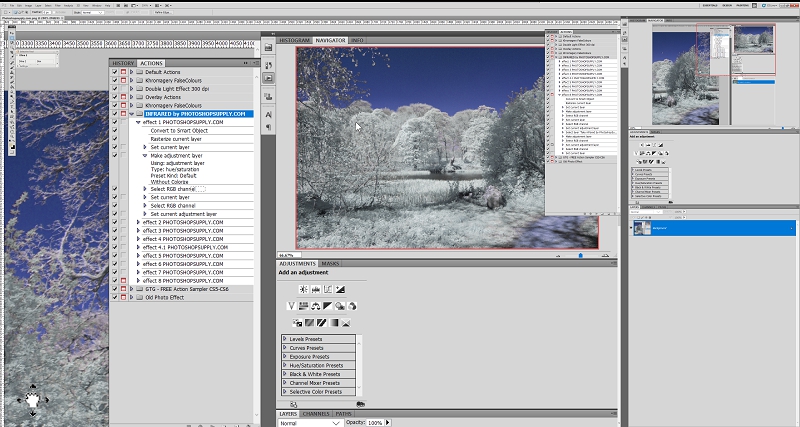
This shows the range of FAUX processing options inside this single .atn file. There are 9 options as number 4 has two options.
You can import your image (for me a Nikon D80 Jpeg here) and then run each action. You end up with a file containing each action as a separate file. The original is there at the bottom, unchanged. I quickly found it was most useful to name each action to avoid confusion! Then you can turn them on and off and use the opacity slide to mix colours and effects.
This shows the complete range of FAUX actions once they have all been run and numbered.
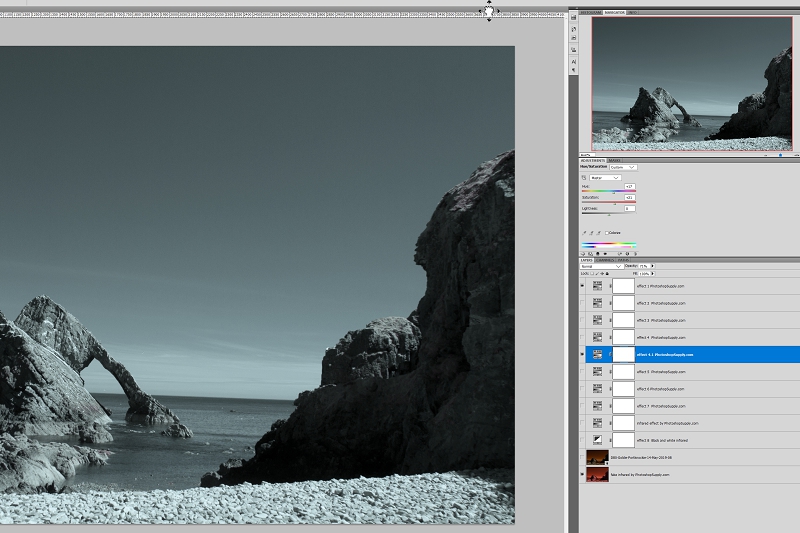
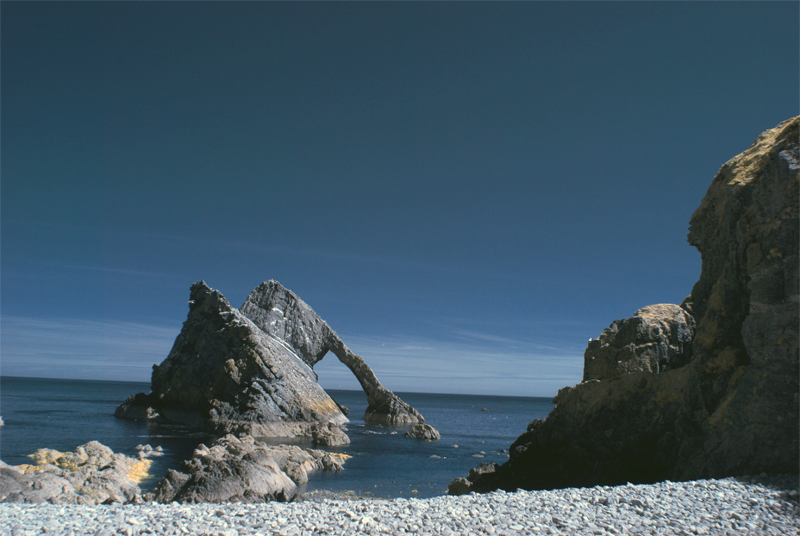
Here I wanted to try both the NEF (RAW file) and Jpeg versions of a shot of the Bow Fiddle rock at Portknockie. I chose actions 1 and 4.1 and lessened the opacity of 4.1 to 71%. Each action has a layer mask, which means you can remove portions of that layer effect too, just as you would with a Quick Mask. It makes for an impressive array of tools to create an original and exciting image!
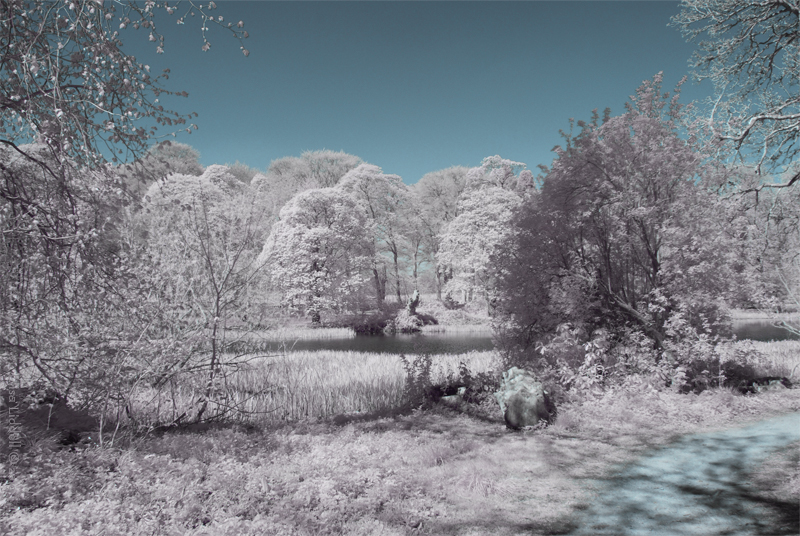
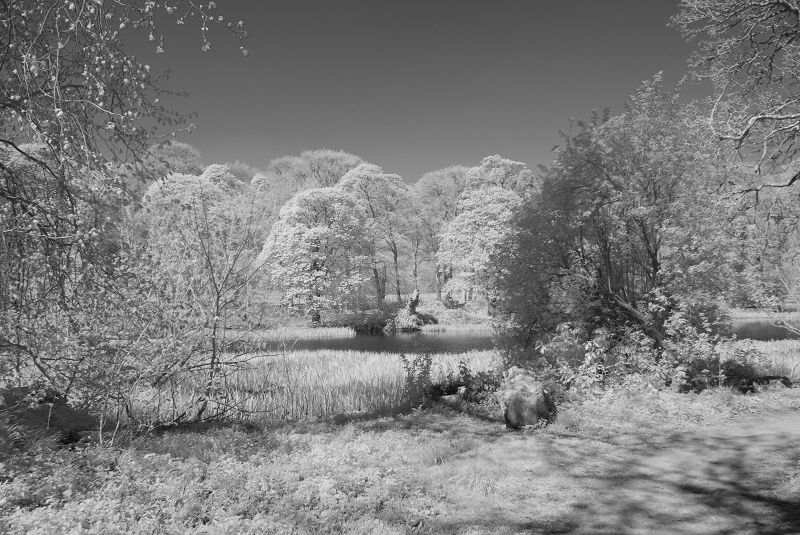
So back to the Fyvie walk shot. Here is the original shot converted into FAUX using the Khromagery action I demonstrated on the previous page.

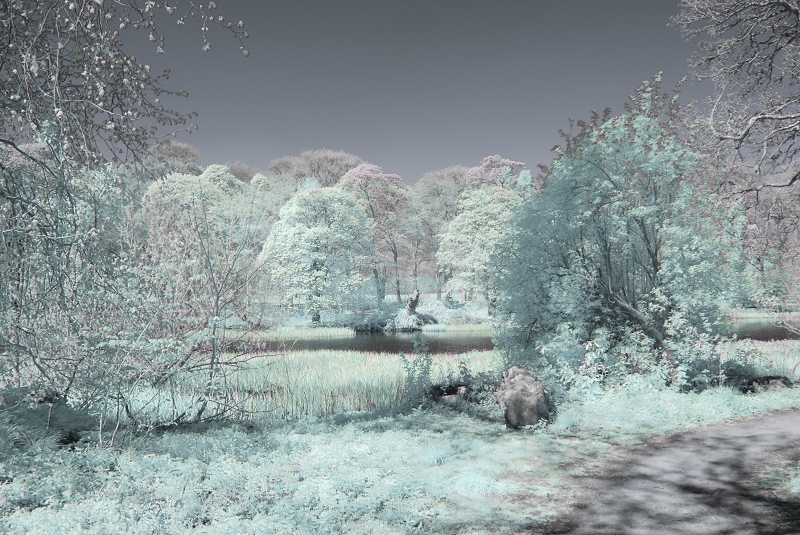
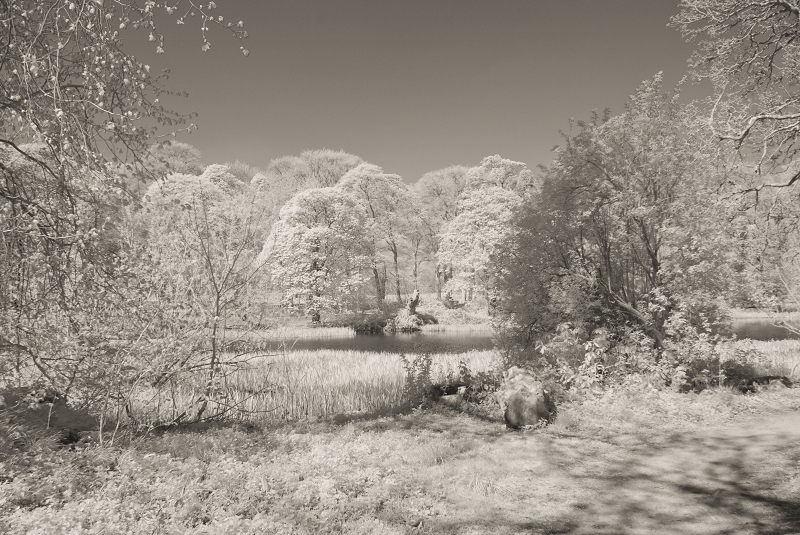
And here is the same conversion using the Photoshop Supply action.

Here the sky is darker and slightly more purple. But the big difference is in the treatment of the trees. Instead of white and gold/ochre tints, you have a blue/grey range of tints. I like them both, so this action is a definite addition to my processing tool kit!
Note: All of these shots are just as they look when applied. I would most probably brighten them before completing .. as I did with the Khromagery image.
Select another Photoshop Supply action and …. how about a pink sky?

Again you have the sky colour reflected in the path and the rock. Maybe it’s the visual effect of the pink sky, but there seems to be a slight green tone to the foliage now.
Next you have another choice, a more turquoise tint to the sky ….
And here there is a definite pink tint to the grass and the near trees.
Or how about duck egg blue to the trees, and a grey sky …..
That particular effect was created by combining 2 effects – using numbers 5 +6. But you can play with the options and make your own mix.
The final action is a straight B+W

I wondered if there was any difference if I chose to desaturate rather than choose B+W
Here I’ve used that technique to the max, and apart from being a little darker it seems the same, though I haven’t studied both versions closely. With the desaturating route you can simply slide move the desaturate slider and fade the colours rather than remove them. Again there is a whole range of options!
Once you are into B+W it is easy to work a sepia version as well, as my final take on this one shot.
These are just a handful of ways that you can develop the image using this single action. I have found it a great addition to the post processing.
It is particularly helpful with handling the NEF files, which are the Nikon version of RAW. When you bring a NEF file into Camera Raw there is a disconcerting effect – the images all turn red

And the effect can be even more intense if you try to adjust the colour using the White Balance – here is the effect of choosing ‘Cloudy’
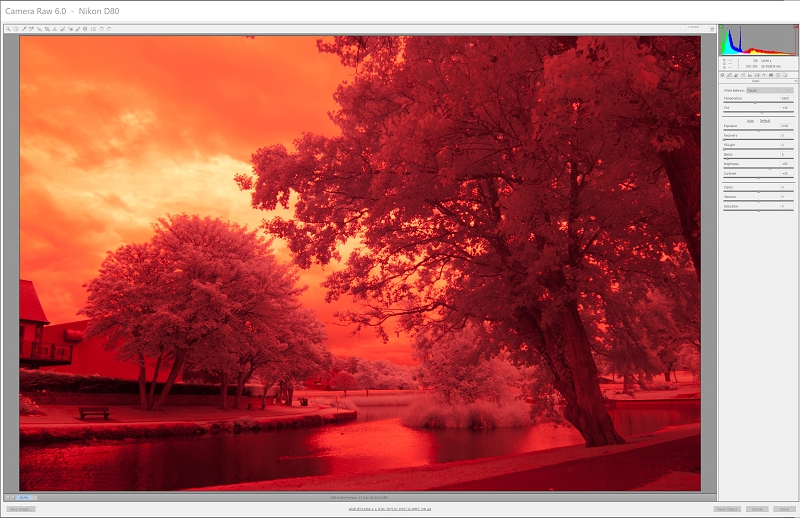
It needs to be a problem to adjust in Photoshop itself, and not Camera RAW!
The whole point of shooting in NEF (or any RAW format) is that the file in not compressed, so you have the maximum file size to work with. Any post processing will inevitably remove some pixels, and the image will gradually degrade each time you affect it. So using my Jpeg I start with a file size between 4.5-5 MB – if I work with the NEF of the same image I will have between 9-9.5MB of data. That difference in file size really matters.
So, returning to the image of the Bow Fiddle rock.
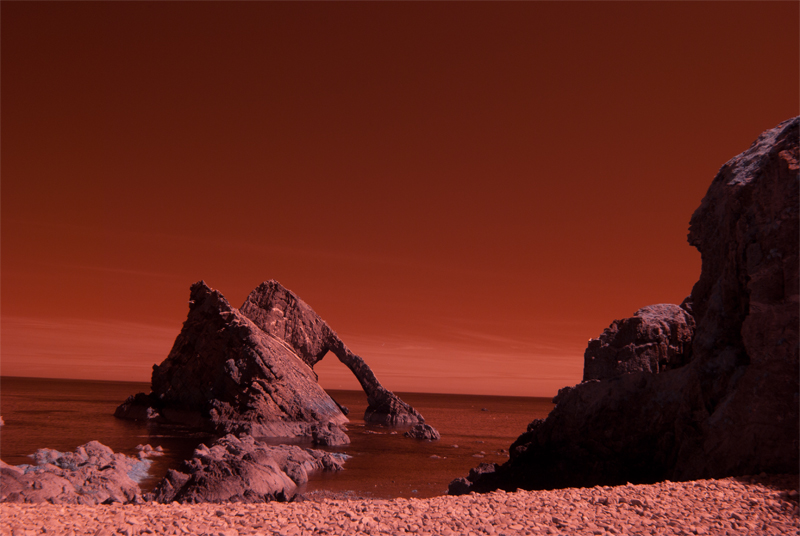
This is the NEF file, giving my the biggest file size to work with, but also the problem of a whole lot of red to contend with.
If I use the Khromagery FAUX conversion I get a pleasing image
But essentially it looks almost like a normal colour photo.
If I use the versatility of the Photoshop Supply FAUX and run all nine options and simply mix and match the results, I can get something quite different!
So I think that the Photoshop Supply FAUX action is a definite for my processing of Nikon Goldie shots … and I guess for a whole lot more besides.
Back to the start of the IR section
My photography articles Talking Digital Photography
Flickr holds Elisa’s online Photo Gallery
© 2019 Elisa Liddell