I shoot leaves a lot – put sunlight and leaves together and I am captivated. But choosing a shot from my store is more difficult. I need to choose carefully if I want to share it with others. The modern world is positively awash with images so if I’m going to add to the ocean of leaf images out there I want my additional drop to make a splash! In other words, I need to be clear about what it is I want to say about the image that I am offering.
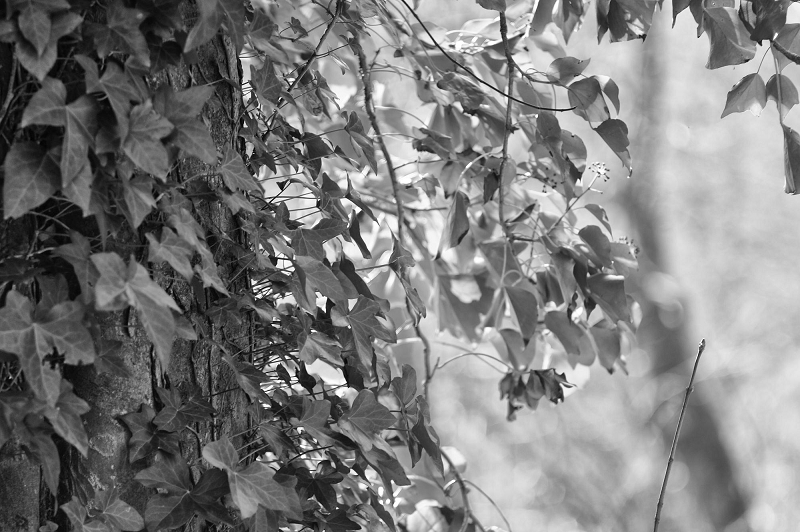
This image from my store drew me.

I think the composition is good and needs almost no work. There’s a strong, dark tree trunk to the left, sunlight in the middle and bokeh to the right. The leaves themselves climb up the trunk and spread out and across the top of the frame. There’s a feeling of the ivy clinging to the tree trunk and growing up it, and then falling down in fronds. So there is a sense of movement, even within the stillness of the leaves!
But there is something more I can add to the image in post-processing – working on it further on the computer. The area I am most interested in is the tree trunk. The detail and texture of the trunk is hidden by the natural shade, and this weakens the contrast between the delicate ivy leaves and the solidity of the trunk. I think that this might be a good candidate for a B+W conversion. Let’s see …..
I want a gentle silvery effect to maximise the quality of the ivy leaves – so my first move is to take the colour image into NIK Silver Efex Pro 2 and choose a treatment that emphasises the qualities I’m looking for.

That works really well. I can see the lines and texture of the tree trunk better already; some of the details in the leaves are showing up nicely; and the bokeh on the right-hand side is clearer. Even the old dead leaf in the centre has changed from being a bit of an eyesore into a useful eye-catching dark tone.
My usual pattern of working with post-processing is to save each step as a separate PSD file. It takes up storage space, but it does mean I can go back to an earlier stage and rework an image. So now I save this stage and then save a flattened TIFF file to move on with.
My next move is to sharpen the image to help the leaves stand out even more clearly, especially against the tree trunk. My favourite sharpening technique is High Pass in Photoshop. This is quite a gentle sharpening technique, and it can be manipulated as a layer – so you can apply it to some areas of the image and not others.
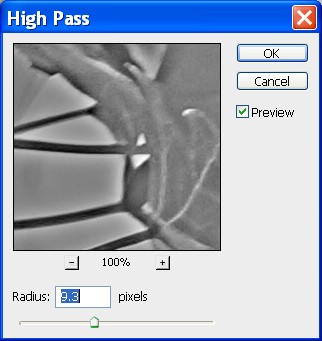
First of all I duplicate the layer. The top layer is going to become the High Pass filter layer. So let’s locate the High Pass filter…

Then I choose the strength of the effect that I want. Looking close up and moving the slider I can try out, apply and then revisit and adjust until I like the result. I settle on a radius of 9.3 pixels – quite strong, but not obvious.

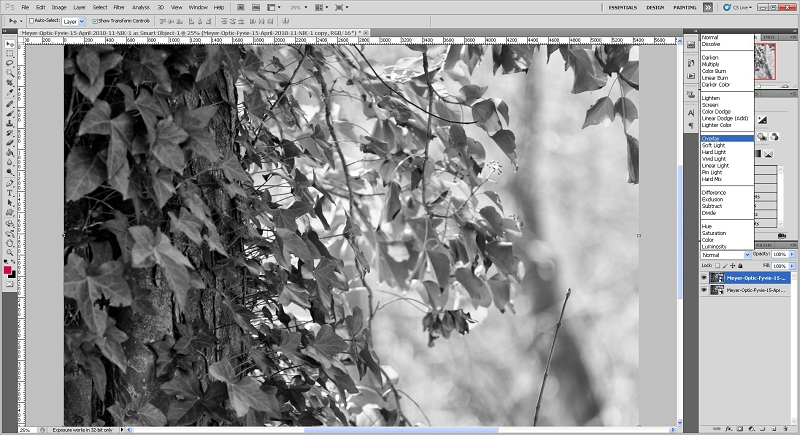
Having made my choice I now have a grey layer hiding the original image. I need to apply it as an overlay.

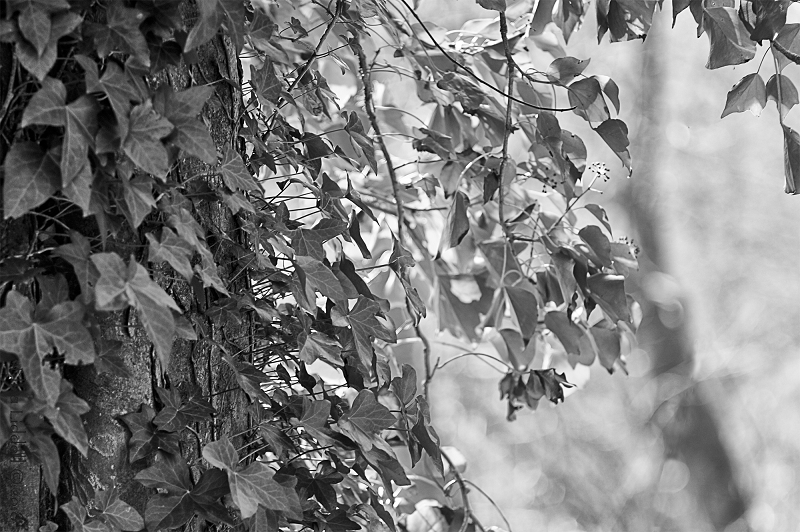
And the final result of the High Pass

The image might need some lightening later on but the sharpening of the detail is what I want. So I save this second stage as a PSD file, and then as a flattened TIFF file, which I open up as a PSD to move on.
Now I am into the final few adjustments. I want to remove the twig that has been bugging me from the start. A quick use of the Clone Stamp tool and it is gone.Then a signature, hidden among the leaves.

And now I am ready to offer the image to the online world ;o)
Flickr holds Elisa’s online Photo Gallery
© 2019 Elisa Liddell
