It’s a cliché, I know – but it’s a cliché because it’s true! Photography, like fine art, is all about the light. Painters have followed the light to the south of France, to Cornwall or even to Tahiti in pursuit of that special quality of light. Photographers will start out before dawn to catch the first moments of sunrise, or wait for the ‘blue hour’ of twilight for their landscape shots. We are all in search of the magic of light!
Living in the north of Scotland much of my photography has to be indoors, especially in the long winter months. And the lament of a friend made me laugh … and then to ponder: “The sun always seems to be in the wrong place or at the wrong angle. Now if I could rotate the house just a bit, and move those couple of windows…” We are always thinking of the light!
It took me back to when I started to teach myself to draw. School didn’t teach me much at all, so when I was ill for many years and had to give up work, I decided to create my own Art School course. I started at the beginning with pencil and paper (best for working from my bed). I wanted to learn to draw really well. I thought it was all about hand technique and expertise, but quickly learnt that it was mostly about ‘seeing’ – it really taught me how to look.
One of my favourite exercises is still something I love to use in photography – it works just as well.
Take, or make, a group of shapes – a bottle, a box, a cone, a cylinder. Paint them uniform matt white (I used white acrylic paint). Set them in a row, on a plain white surface and against a plain white background (I use paper). Shine a light on them. Now draw what you see. It’s important that the objects are matt and not shiny – shiny creates a whole other range of light effects. And you want to keep it all as close to white on white as you can, as colour also complicates things. You want to keep the focus on the way the light falls and the way the shadows form. Everything should be as simple as possible.
Now you have hours of fun learning all about light and how it falls and changes what we see. Move the objects around so they cast shadows on each other. Make long and short shadows. Change the light source to a different angle, a different intensity.

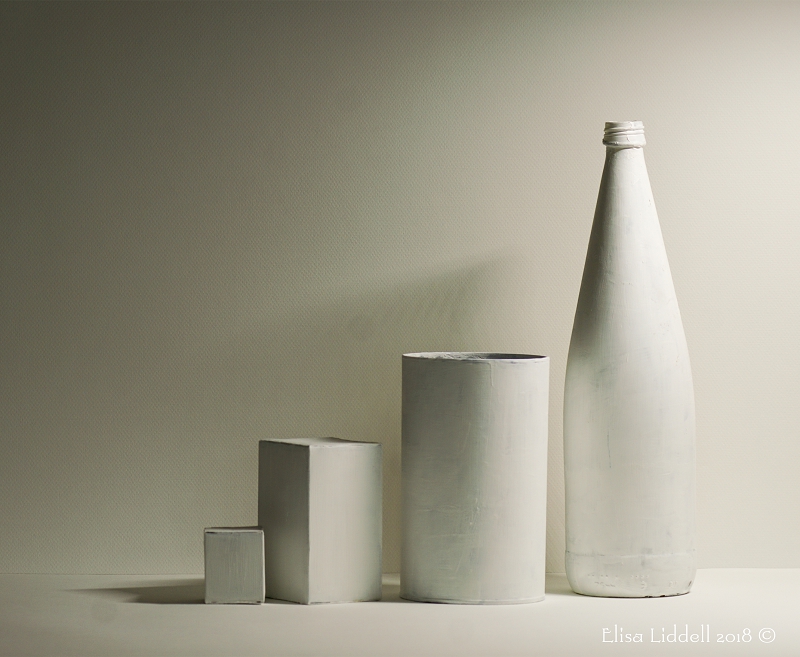
Here I have used one light shining from the top right.
The light is quite strong, to make the shadows crisp. I spaced the objects grading them by height, from tall to small. I chose slightly differing spaces between them, and I placed both boxes at an angle too.
The first thing that strikes me is the powerful dark shadow that’s cast on the bottle. It catches the eye. And there’s a similar effect on all the objects, though less marked the further away from the light they are. The second thing that strikes me is that the dark shadow doesn’t run down the whole length of the bottle. It stops quite abruptly – and it stops where the cylinder begins. The light shining on the cylinder bounces back, and strikes the bottle, cutting into the darkness of the shadow on the bottle. (This bounce is used a lot in photography, especially in portrait shoots, where a gentle shadow in needed). I placed the objects so that each one shows a bounce, and softens the shadow of the object to the right. The bottle has nothing to its right, so its right-hand side merges with the white background, and loses definition. The eye completes the bottle shape by looking at the base, where the round helps the brain fill in the missing visual information.
Having the wizardry of a camera you can help yourself (and your eye) by making your image black and white. The clearest image uses the greyscale which gives as many shades of grey as possible. It is a more refined and complex version of an age-old painters tool which I used to use in painting. I painted a piece of clear glass with black acrylic paint on one side. Holding the clear surface of the glass against your painting turns it into a B+W version. Cutting out the colour makes it easier to see the tonal range and values you are using. Now I can simply take a B+W snapshot of my painting as I go along!
Here is another ‘take’ on the same group of objects, re-arranged slightly. This time I used a gentle light from the left, and combined it with another gentle light straight on – natural sunlight from a window.

The shadows are now both gentler, and more complex.
The addition of gentle sunlight has given a creamy cast to the objects, and made the foreground paper somewhat grey – making the objects sit more firmly on the ground. I also placed the objects closer to the backing paper. This makes the shadows crisper and easier to ‘read’. Notice how the 2 light sources are making 2 distinct bottle shadows cast on the background. And now there are more complex shadows cast by the two boxes as they overlap and hit the cylinder. And now the simple shadow cast by the cylinder onto the bottle has a strip of darker shadow in the middle. Visually the whole ‘feel’ of the image is quite different from the first one.
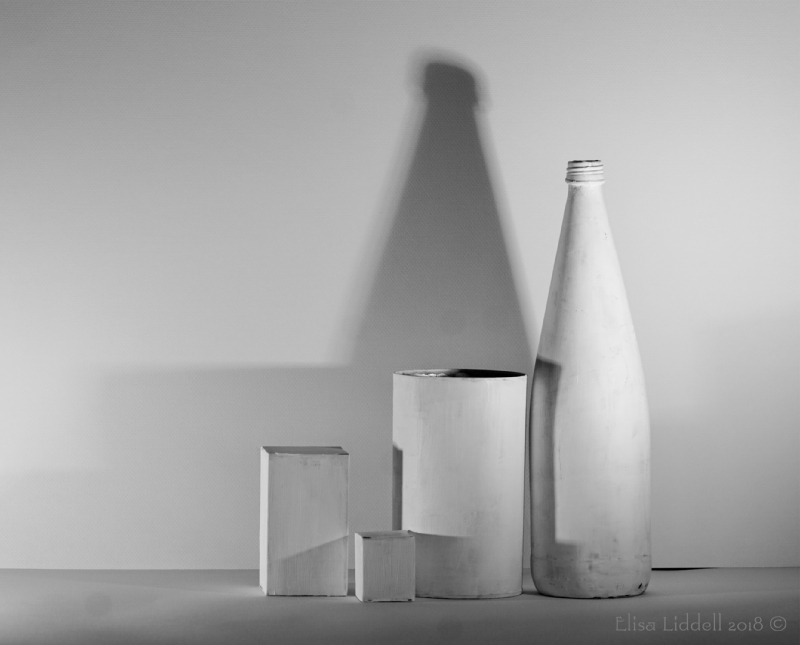
My third variation uses a strong light from the right again, but this time from low down.

I did a B+W conversion in Photoshop, as the light was, in fact, quite yellowing.
And I also added a gentle light from the left, to illuminate the left sides of the boxes, and create a ‘bounce’ effect from the boxes onto the ground.
Here the cast shadow of the bottle is distorted by the low angle of the primary light. And the combination of lights gives an unusual shadow effect from the cylinder onto the bottle. Keep looking, and more emerges!
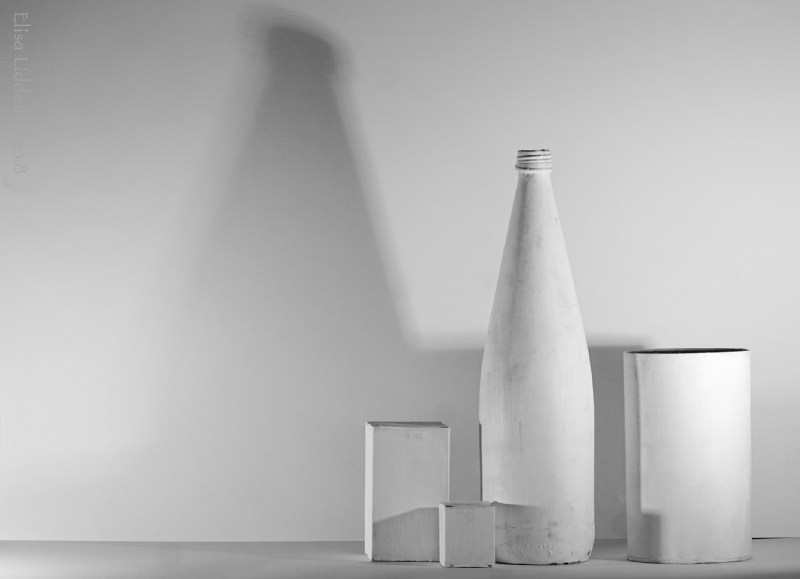
And finally I moved the pieces of the composition around a little more, keeping the same low primary light as in figure 3 but adding an almost equal light from the left, but higher up.

Here the shadows are more diffuse, less dramatic, and more subtle.
There are so many ways to play around with just these 4 objects and a couple of light sources. It really IS ‘all about the light’. And now we have so many light sources to hand from natural sunlight through candle light to the most recent LED lights. Plus a range of sizes from studio lights to the smallest single LED torch. And then there’s the colour range. I guess we’ve all experienced shooting at night with sodium street lighting – well, as the variety of types of light expands, so does the range of tints that they produce, from blue through to yellow. Searching for that rare treasure of a man-made light that offers genuine ‘white light’ is a real quest. Finding it is a real delight! So we really need the camera’s inbuilt adjustments with White Balance, together with a really good post- production computer software program to get the ‘simple’ austerity of B+W and greyscale images. All that technology and skill to reproduce what a pencil and a piece of paper can produce. Makes you think even more!!
Flickr holds my online Photo Gallery
© 2019 Elisa Liddell
