First outing for the Lensbaby Twist 60, shooting the loch-side walk at Fyvie Castle
The kind of place you just want to sit and watch the world go by! The rhododendrons are still blooming at Fyvie Castle. Too good to miss the chance to enjoy them! And a chance to try out my latest Lensbaby optic, the Twist 60.
Early in 2018 we were just emerging from from a long and extremely harsh winter when I made my first visit of the the year to Fyvie Castle and loch. It’s my favourite local haunt, for walking, sitting and relaxing, and of course photography. So I took a camera or two, just to familiarise myself with the ‘outdoor’ lenses. Most of the winter I shoot indoors, which means macro, close-up or medium lens still-life. So I needed to flex the muscles and re-learn or remember the individual personalities of the lenses I use for landscape and outdoor shooting.
My newest outdoor lens is the Meyer-Optik Orestor 135mm f/2.8 (1966) which arrived just before the winter closed in. So I’d not had much chance to get to know the lens and what it can offer. I’ve collected a few ‘vintage’ lenses from Eastern Europe, and been impressed with the quality of shots modern digital cameras can produce using them. The rich and vibrant range of colour values is striking – and this particular lens is nicknamed “the bokeh monster”, which strikes an appreciative chord with me too! [More about it here, and a further link to the album of shots I’ve taken using it are on my Flickr site.]
So I set out with low expectations, both for the beauty of the location at the end of winter, and for my technical expertise. We had some sunshine, which is so essential, as we strolled along the sunny banks beside the loch. Being a lens from way before the digital age, it needs to be used in full Manual mode, which means setting White Balance, ISO, Shutter speed and Aperture (F stop) on the fly. I want full control over the focus too, as often my interest is not on the closest subject (which is what auto-focus selects). Also there is no IS (image stabilising) so a tripod may come in handy too. I knew from my first experiments last autumn, that F4 or even F2.8 would give me the best bokeh chances. So finding a focal point close by was what I had in mind.
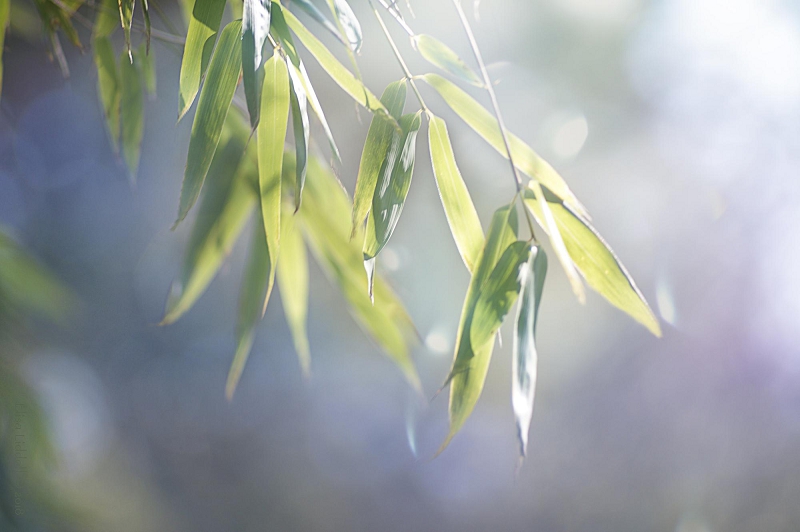
So – on to the actual shot I’m discussing here. A small frond of leaves lit by the sun caught my eye. Beautiful, simple, and great for a bokeh effect. But closer inspection on the computer screen showed just how much damage the winter freeze had done to the leaves.
Leaves in the sunlight – the original shot
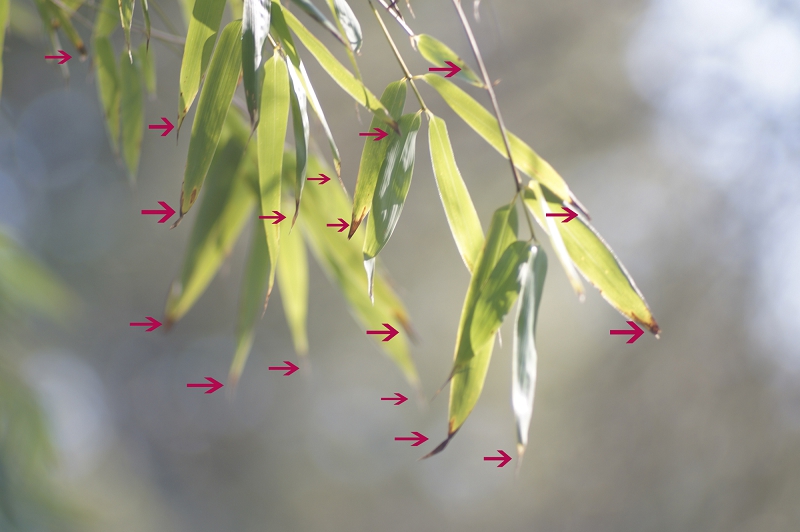
The composition is there, the light streaming in from the top right is lovely, and the bokeh is great – not distracting, but giving a texture to the background. But the damage is so evident – it distracts the viewer! So, if I was to make anything of the photo, I needed a lot of patient work in Photoshop with the Clone Stamp tool. I identified at least 17 places that needed attention.
Leaves, searching out the points to work on
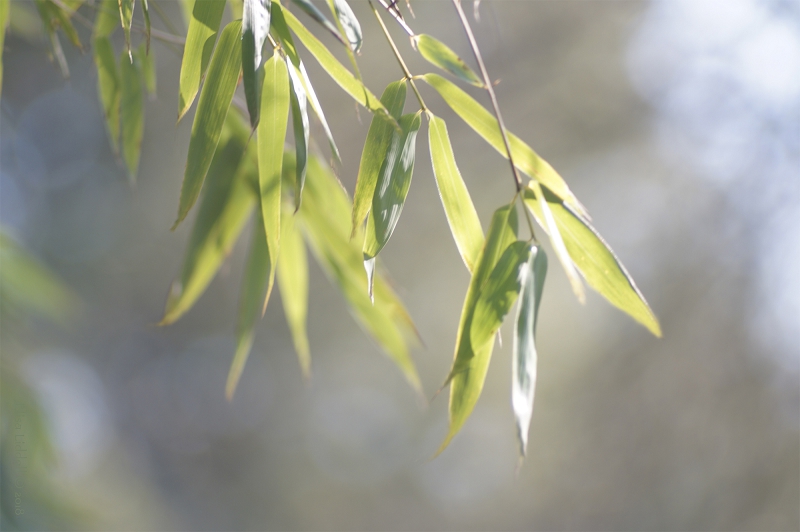
I set to work. The clone stamp tool is a miracle-worker. Used carefully it can transform an image. Here I needed to work with a brush size of between 20-100 pixels. I took the sample from as close to the damaged leaf area as I could, and used a strength of between 40% and 60% most of the time. With a soft brush that leaves little visible trace of the pixel overwriting. I didn’t want to remove all traces of damage, just most of them!
Leaves in the sunshine, cleaned up with Clone Stamp
The image was now usable – and what I wanted to do was to enhance the image without destroying what was already there. I thought I could enhance the bokeh, and add some more colour interest to the background. My choice for this was a great favourite of mine – Mix Pix Box – There is a wonderful collection “Light Bokeh Overlays” that would be perfect for the shot.
Light Bokeh overlay from MixPixBox
I used this overlay TWICE in different ways. The first layer I applied using the Screen option at 60%. The second time I chose Soft Light setting at 83%. The first offered most light, the second offered most colour. Combined they worked well. I used a Quick Mask on both to bring the leaves forward by gently removing some of the overlay.
Using the MixPixBox overlay on the cleaned image.
And the final result
The final image of Leaves in the sunshine
The ‘bones’ of a good shot were there in the original. But it took some post processing work to let them shine through!
I shoot leaves a lot – put sunlight and leaves together and I am captivated. But choosing a shot from my store is more difficult. I need to choose carefully if I want to share it with others. The modern world is positively awash with images so if I’m going to add to the ocean of leaf images out there I want my additional drop to make a splash! In other words, I need to be clear about what it is I want to say about the image that I am offering.
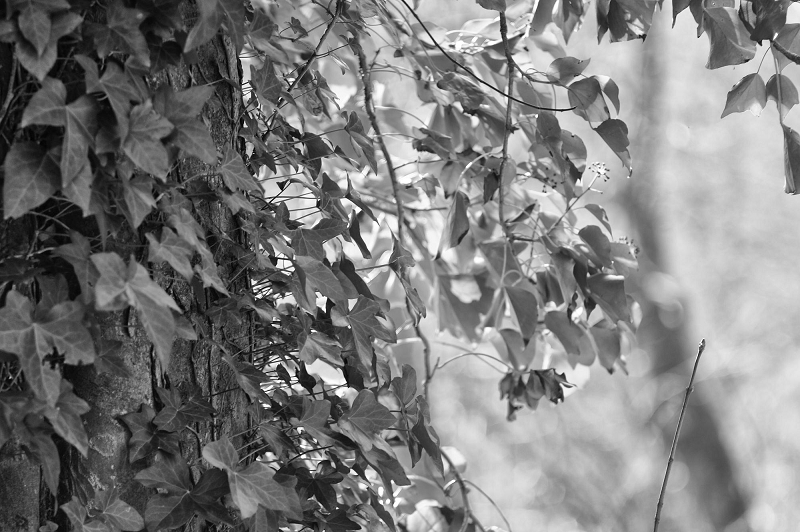
This image from my store drew me.
the original shot of ivy leaves and the sun shining through them
I think the composition is good and needs almost no work. There’s a strong, dark tree trunk to the left, sunlight in the middle and bokeh to the right. The leaves themselves climb up the trunk and spread out and across the top of the frame. There’s a feeling of the ivy clinging to the tree trunk and growing up it, and then falling down in fronds. So there is a sense of movement, even within the stillness of the leaves! But there is something more I can add to the image in post-processing – working on it further on the computer. The area I am most interested in is the tree trunk. The detail and texture of the trunk is hidden by the natural shade, and this weakens the contrast between the delicate ivy leaves and the solidity of the trunk. I think that this might be a good candidate for a B+W conversion. Let’s see ….. I want a gentle silvery effect to maximise the quality of the ivy leaves – so my first move is to take the colour image into NIK Silver Efex Pro 2 and choose a treatment that emphasises the qualities I’m looking for.
The ivy leaves transformed into B+W using NIK software
That works really well. I can see the lines and texture of the tree trunk better already; some of the details in the leaves are showing up nicely; and the bokeh on the right-hand side is clearer. Even the old dead leaf in the centre has changed from being a bit of an eyesore into a useful eye-catching dark tone.
My usual pattern of working with post-processing is to save each step as a separate PSD file. It takes up storage space, but it does mean I can go back to an earlier stage and rework an image. So now I save this stage and then save a flattened TIFF file to move on with.
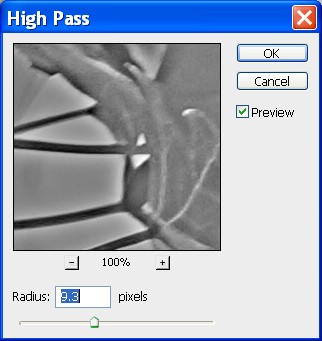
My next move is to sharpen the image to help the leaves stand out even more clearly, especially against the tree trunk. My favourite sharpening technique is High Pass in Photoshop. This is quite a gentle sharpening technique, and it can be manipulated as a layer – so you can apply it to some areas of the image and not others. First of all I duplicate the layer. The top layer is going to become the High Pass filter layer. So let’s locate the High Pass filter…
Using the High Pass filter in Photoshop CS5
Then I choose the strength of the effect that I want. Looking close up and moving the slider I can try out, apply and then revisit and adjust until I like the result. I settle on a radius of 9.3 pixels – quite strong, but not obvious.
Close up of how High Pass can sharpen an image
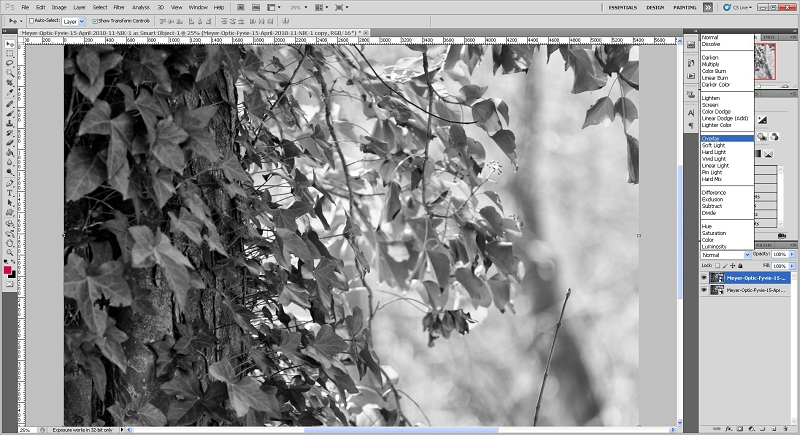
Having made my choice I now have a grey layer hiding the original image. I need to apply it as an overlay.
Using ‘Overlay’ menu setting to apply High Pass to the image
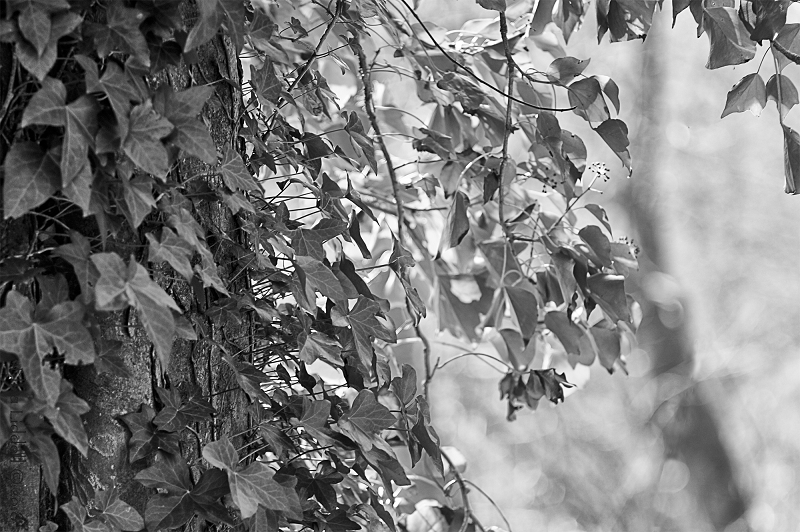
And the final result of the High Pass
Ivy leaves in B+W with High Pass applied
The image might need some lightening later on but the sharpening of the detail is what I want. So I save this second stage as a PSD file, and then as a flattened TIFF file, which I open up as a PSD to move on. Now I am into the final few adjustments. I want to remove the twig that has been bugging me from the start. A quick use of the Clone Stamp tool and it is gone.Then a signature, hidden among the leaves.
Clone Stamp used to remove a stray twig. Transformation complete.
And now I am ready to offer the image to the online world ;o)